Build 3D Scenes
Tier0 enables you to build a scene using 3D models that have been mapped with real-time UNS data for live display.
Additional Parameter Description
-
Scene Description.
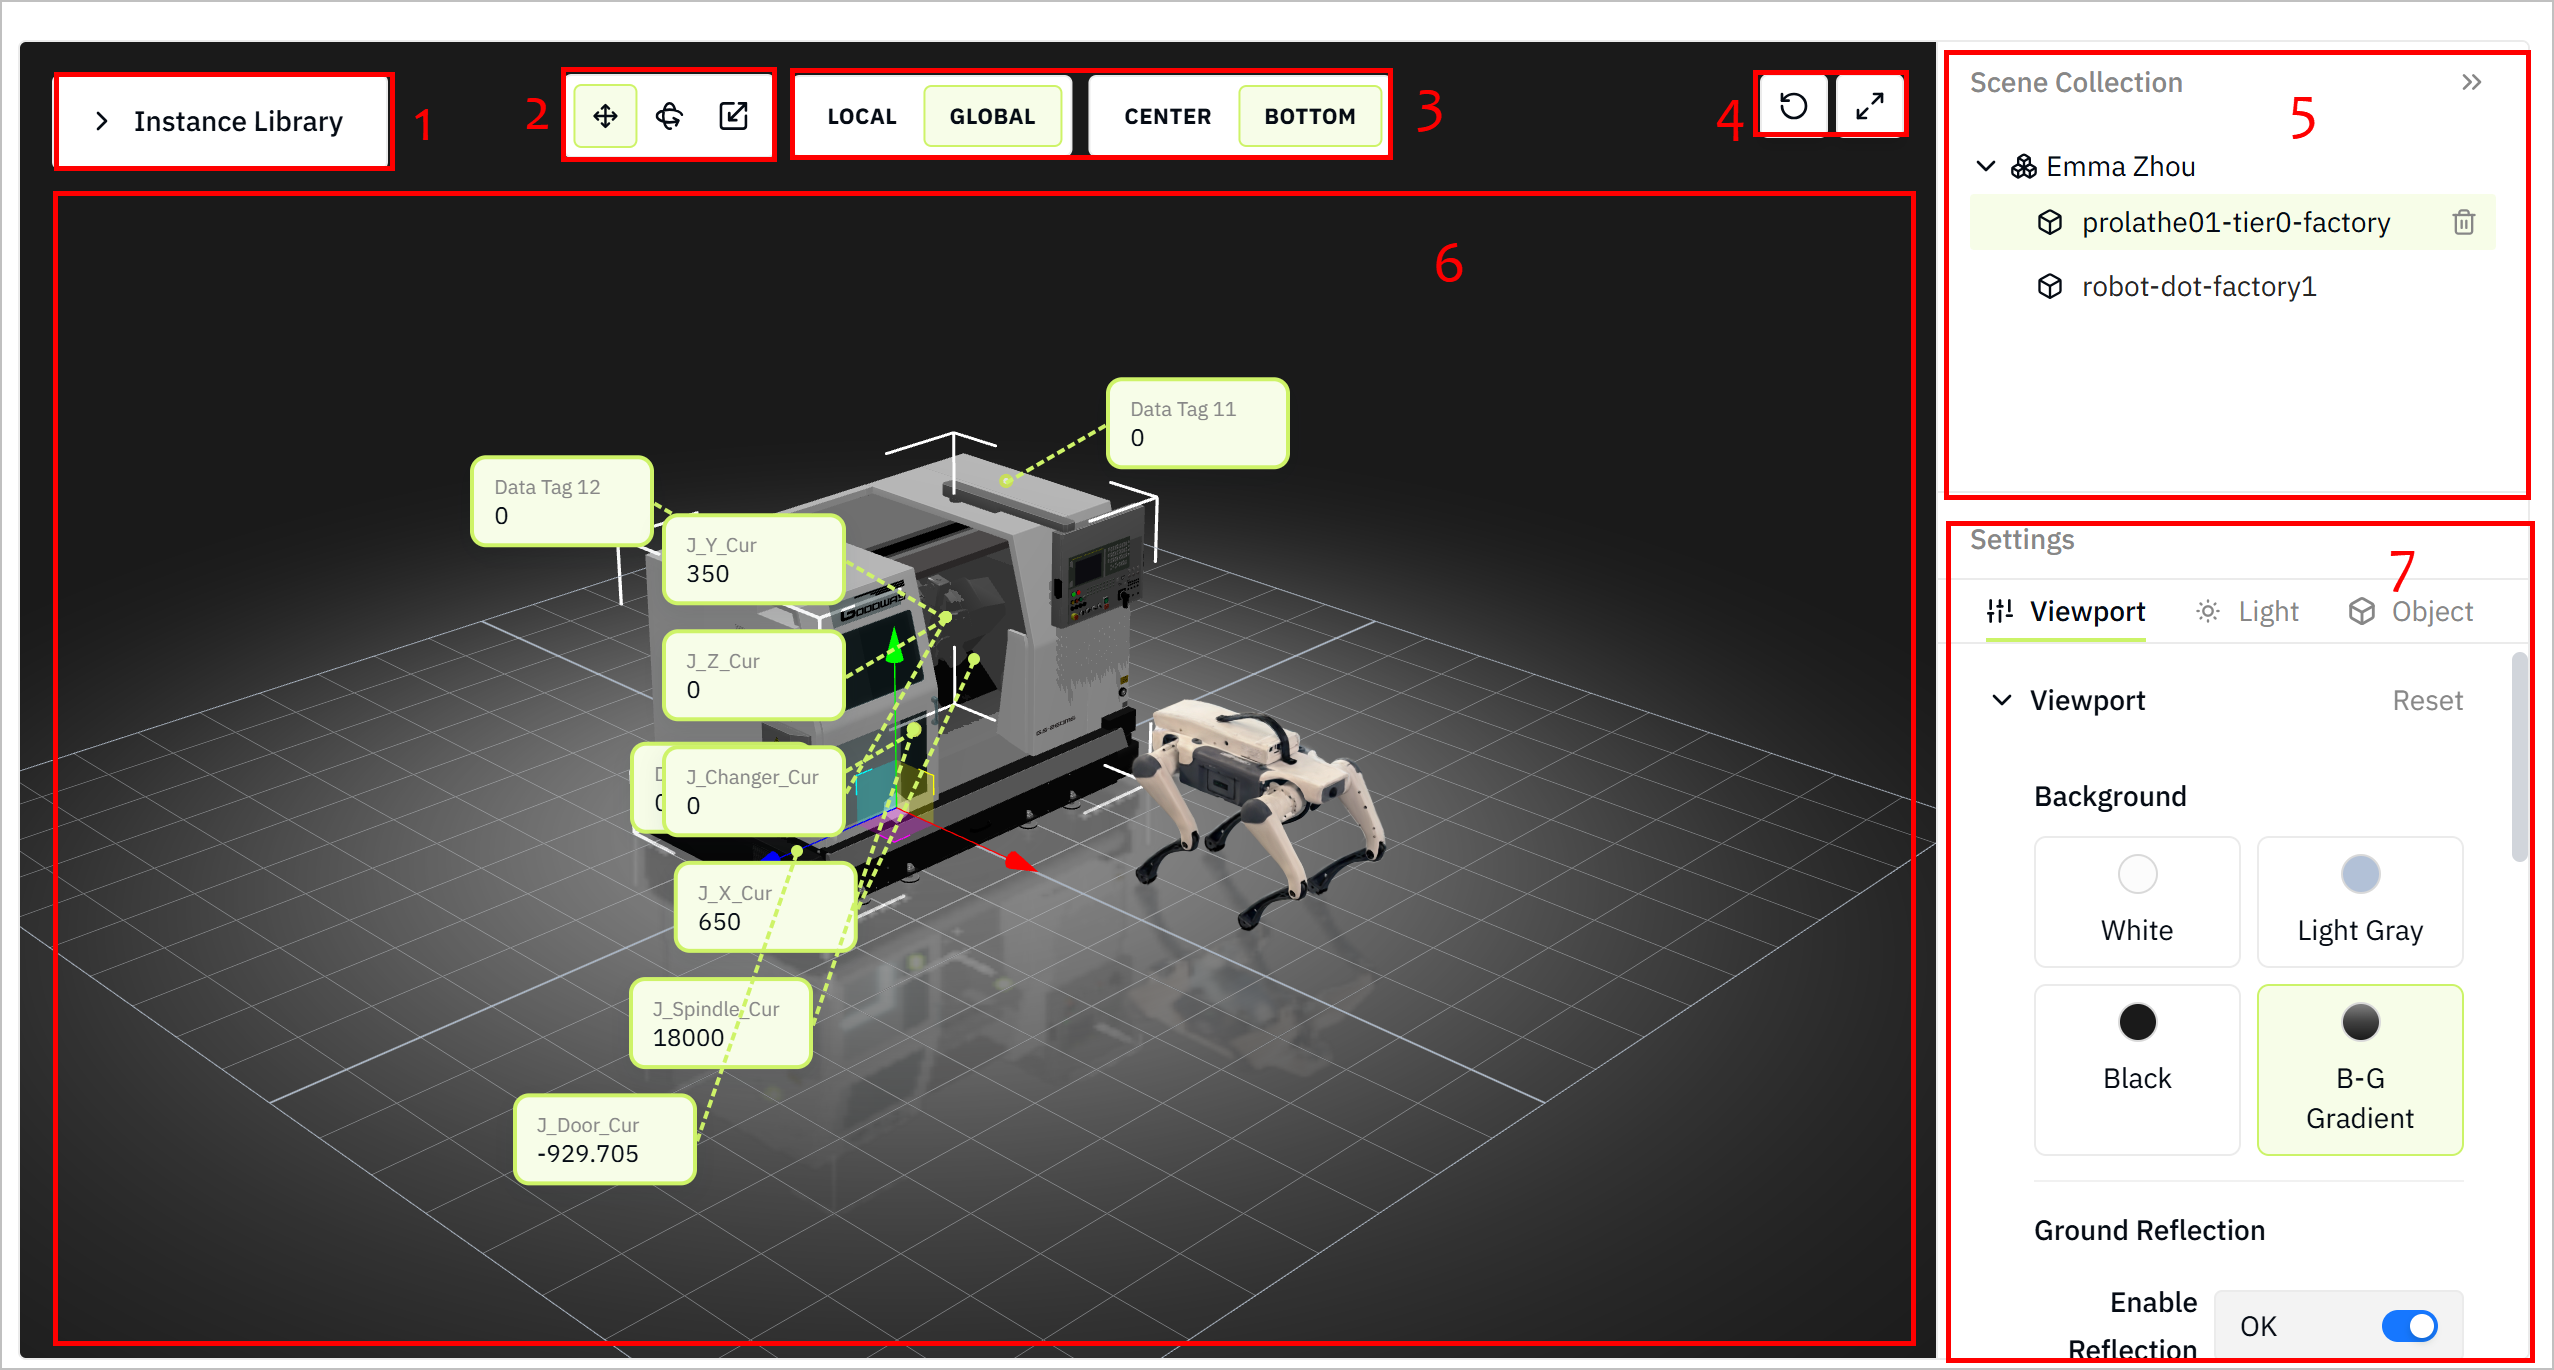
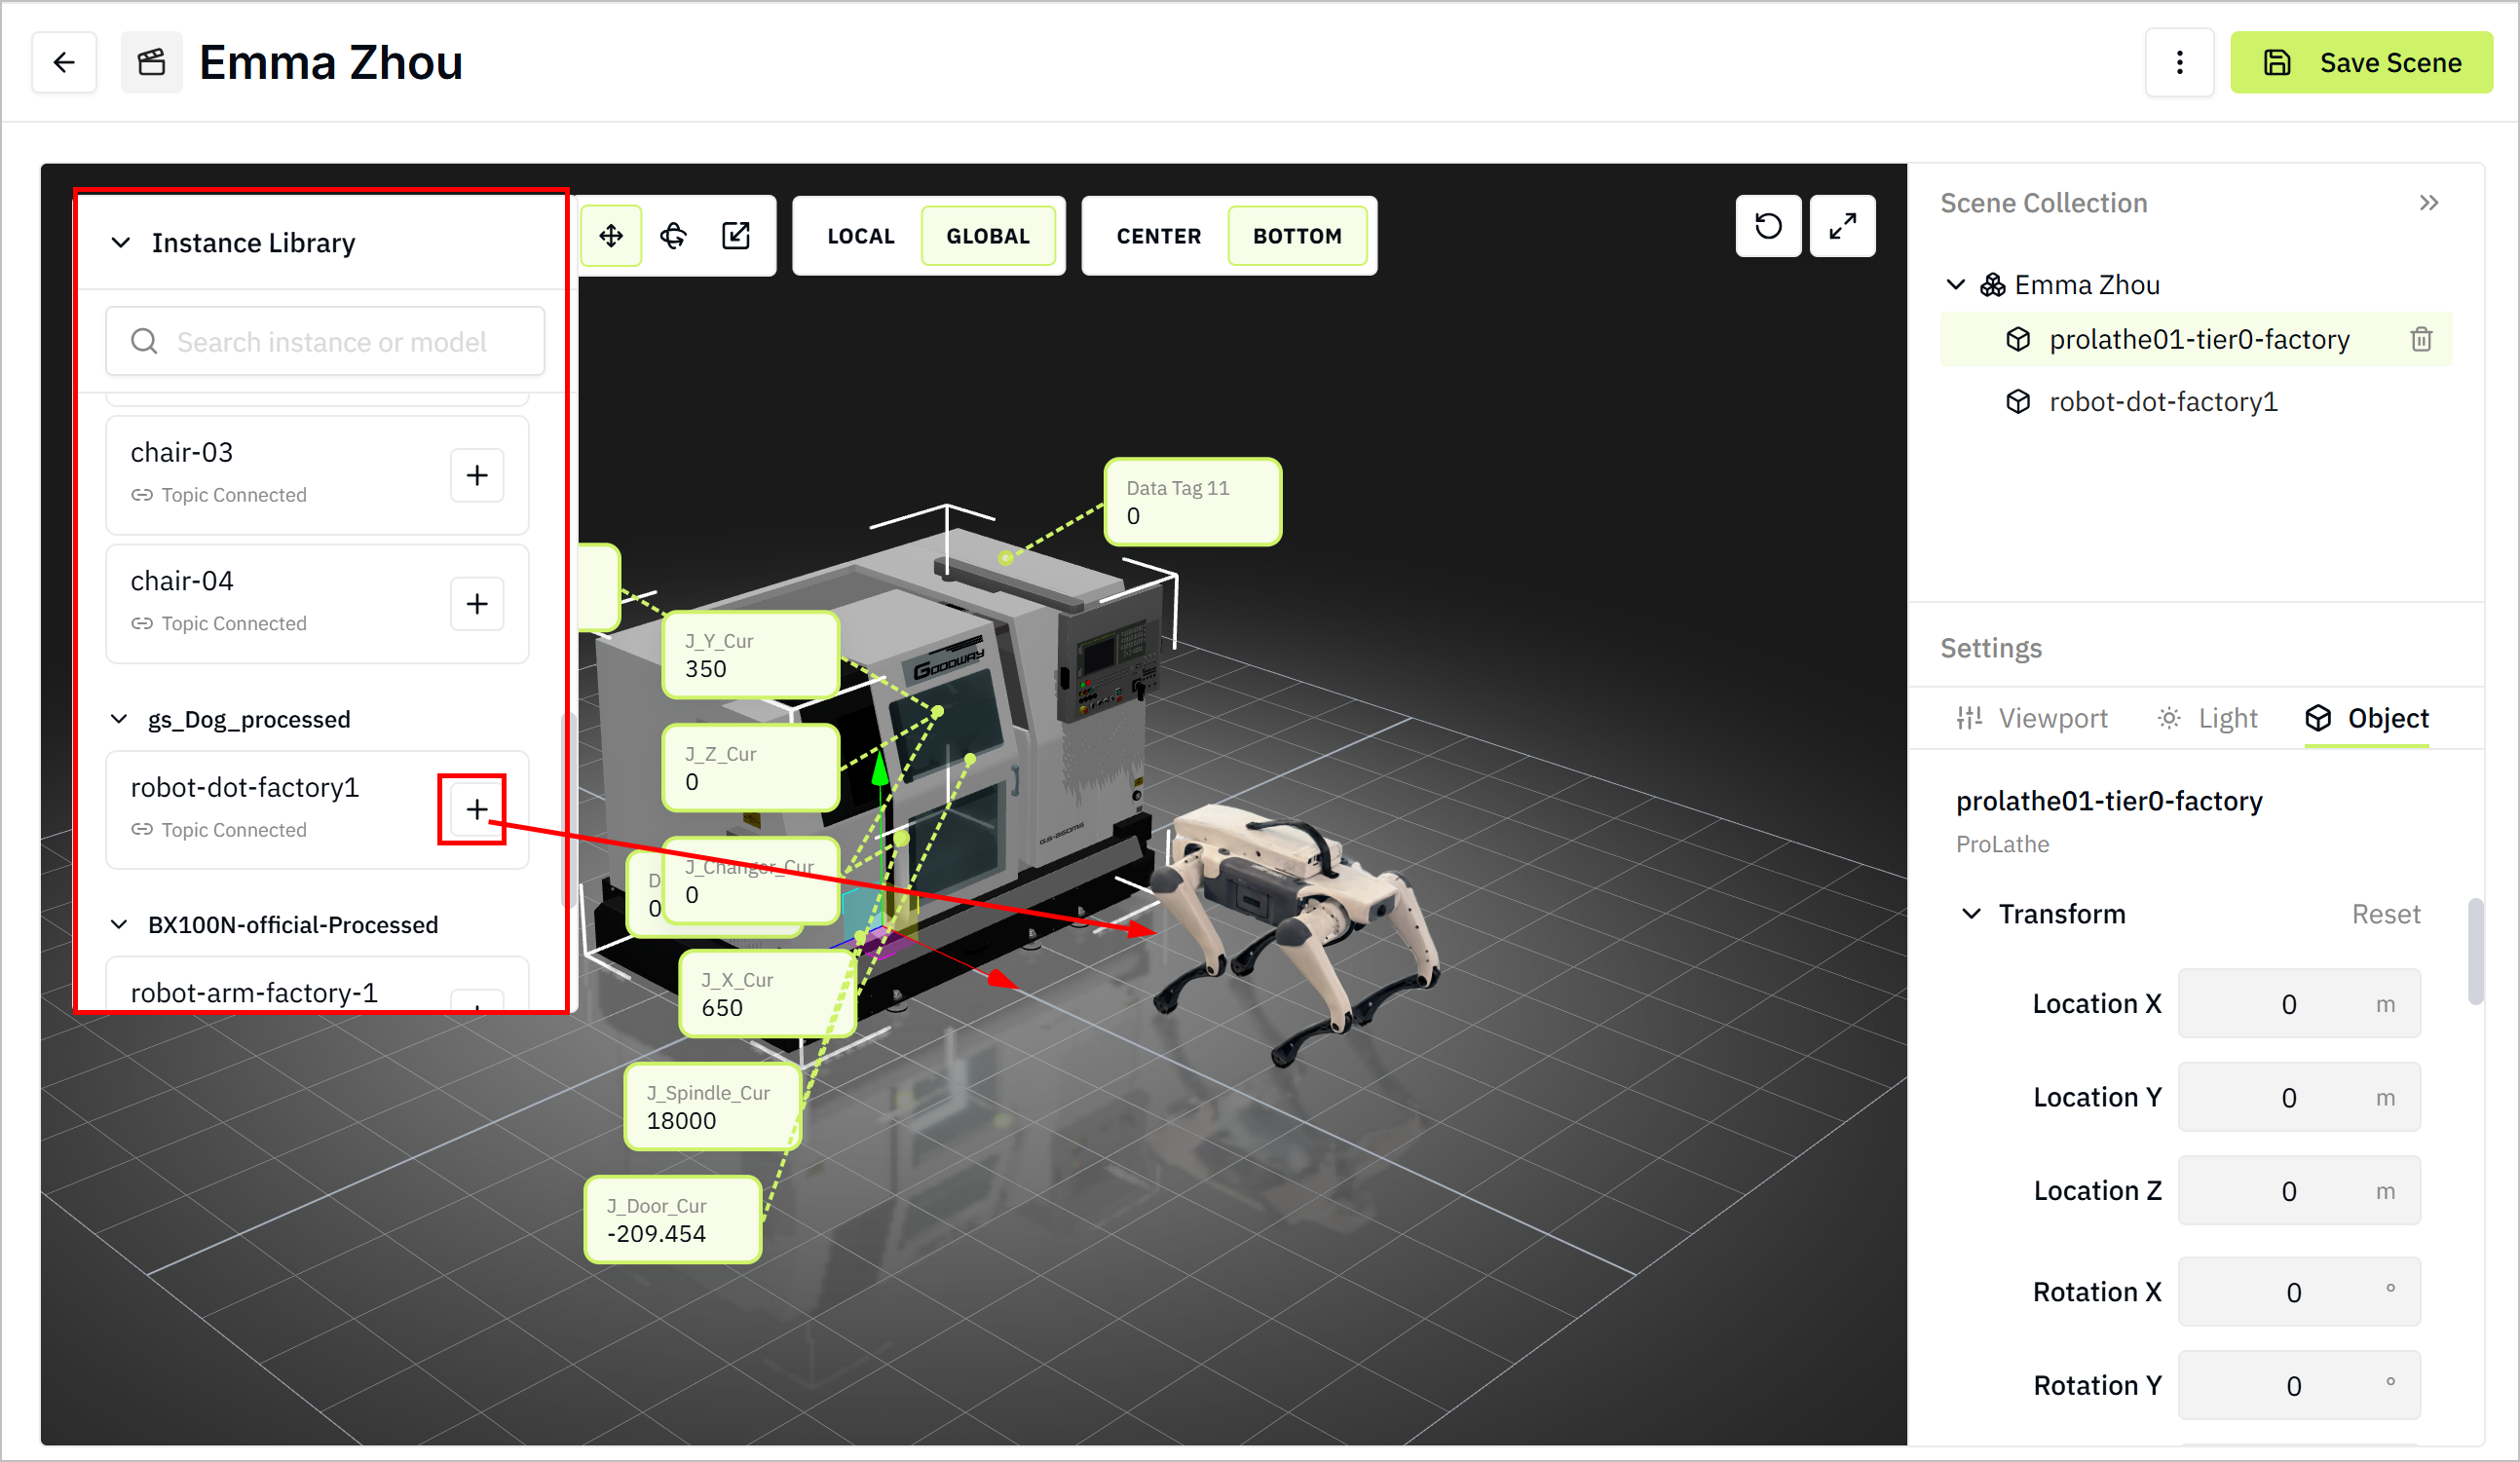
No. Module Item Description 1 Instance Library Lists all configured models from Model Library. 2 Model Position  /
/ /
/
Moves/rotates/scales the model along the X, Y and Z axes. 3 Axis Local/Global Decides whether the model coordinates is based on the model itself, or the entire screen. Center/Bottom Sets the coordinates position to be at the center or bottom of the model. 4 General Operations  /
/
Restores the scene to the original viewport/Views the scene in full screen. 5 Scene Collection Lists all models in the scene. 6 Canvas Displays the scene canvas. 7 Settings Viewport Sets the scene viewport, including background, camera parameters and grid layout. Light Sets the lighting conditions in the scene under different types of presets. Object Displays the attributes of the selected model in the scene. You can edit its position by manually changing the values. -
Viewport
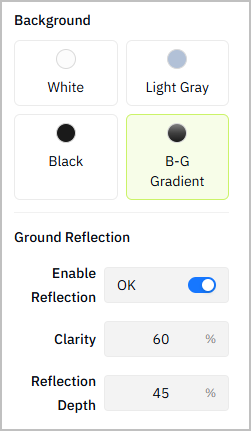
Parameter Description Background Background style of the scene canvas. Ground Reflection Controls whether a reflection effect appears beneath the models, simulating a reflective ground surface. Enable Reflection Turns the ground reflection effect on or off. Clarity Adjusts how clear or sharp the reflection looks. Higher values produce a clearer reflection. Reflection Depth Adjusts the vertical range or depth of the reflection. A higher value usually makes the reflection extend farther downward. -
Camera
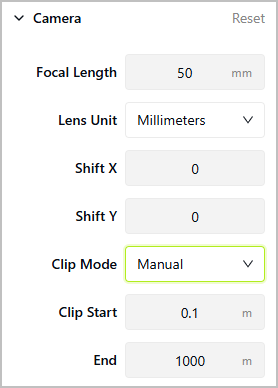
Parameter Description Focal Length Sets the camera focal length. A smaller value gives a wider view. Lens Unit Specifies the unit used for the lens setting. In this example, the focal length is measured in millimeters. Shift X/Y Moves the camera view horizontally/vertically without rotating the camera. Positive or negative values shift the framing left or right/up or down. Clip Mode Specifies how the camera clipping range is controlled. In Auto mode, the system automatically calculates the visible range based on the scene. In Manual mode, you can set the near and far clipping distances using Clip Start and End. Clip Start Defines the nearest distance from the camera at which objects start to be visible. Objects closer than this distance will be clipped. End Defines the farthest distance from the camera at which objects remain visible. Objects beyond this distance will be clipped. -
Grid
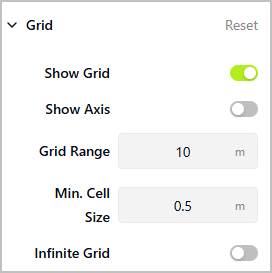
Parameter Description Show Grid Whether the grid is visible in the scene. Show Axis Whether the coordinate axes are displayed in the scene. Grid Range Defines the overall visible size of the grid area. Min. Cell Size Defines the minimum size of each grid cell. Infinite Grid Whether the grid extends infinitely instead of being limited to a fixed area.
-
-
Light
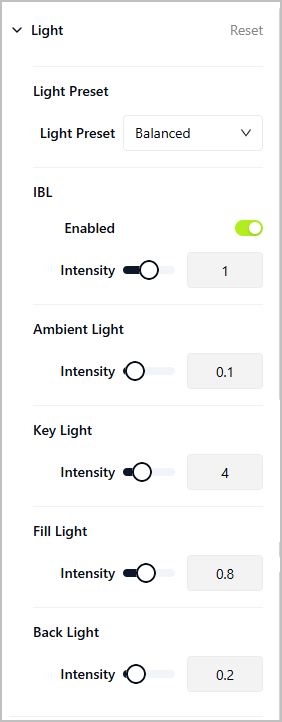
Parameter Description Light Preset Selects a predefined lighting setup. Available options include Balanced, Soft, and Contrast. IBL Enables image-based lighting, which uses an environment image to provide realistic ambient illumination and reflections for the scene. The intensity value controls the strength of the IBL effect. Ambient Light Controls the intensity of ambient light, which provides overall non-directional illumination to the entire scene. Key Light Controls the intensity of the main light source, which is the primary light shaping the object and creating the main highlights and shadows. Fill Light Controls the intensity of the fill light, which softens shadows created by the key light and reduces contrast. Back Light Controls the intensity of the back light, which illuminates the object from behind to help separate it from the background.
How to Build a Digital Twin Scene
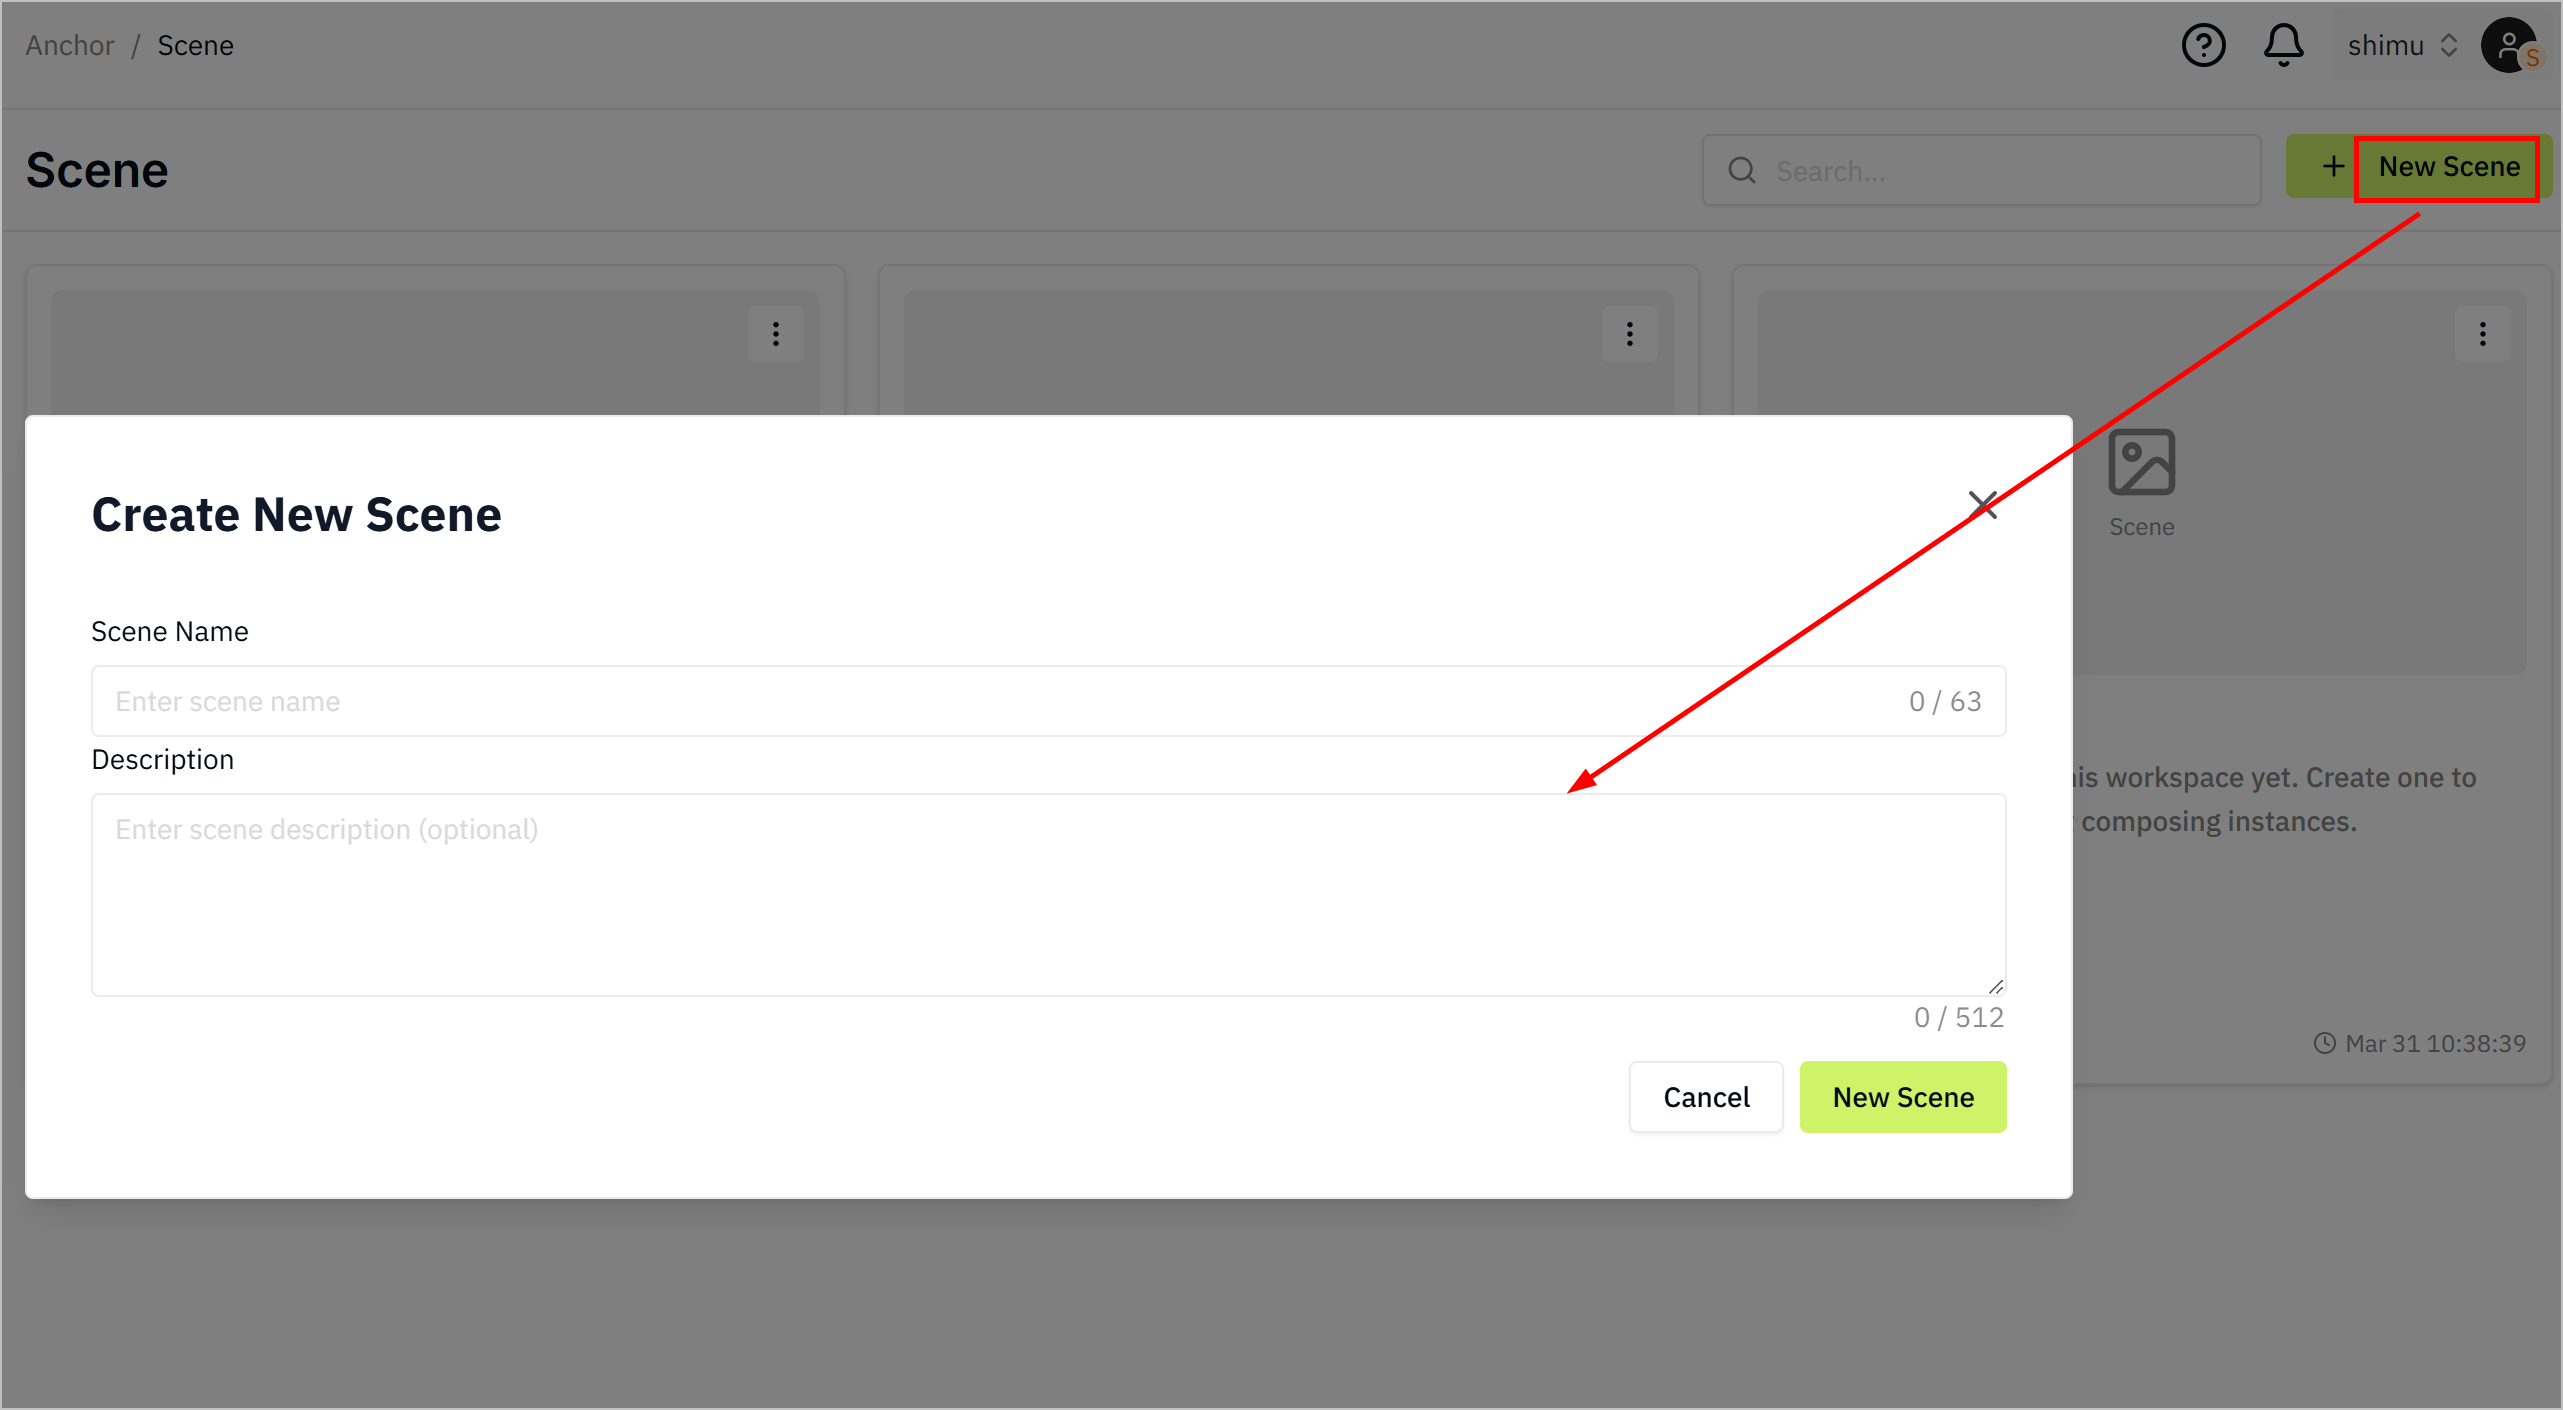
- Log in to Tier0, select Anchor > Scene.
- Click New Scene at the upper-right corner, enter the scene information, and click Create.
- Open the created scene, select instances from Instance Library on the left.
-
Configure the models added to the scene.
- Set the model coordinates.
- Adjust the model position, rotation and scale based on the selected coordinates.
- On the right side, edit the viewport, camera and grid as needed.
- Edit lighting settings.
- (optional) Edit the model position by setting the numbers under Object > Transform.
-
Click Save Scene at the upper-right corner.