Configure 3D Models
The digital twin feature is available on the platform to help you visually build data models.
Uploading Digital Twin Models
- Log in to Tier0, select Anchor > Model Library.
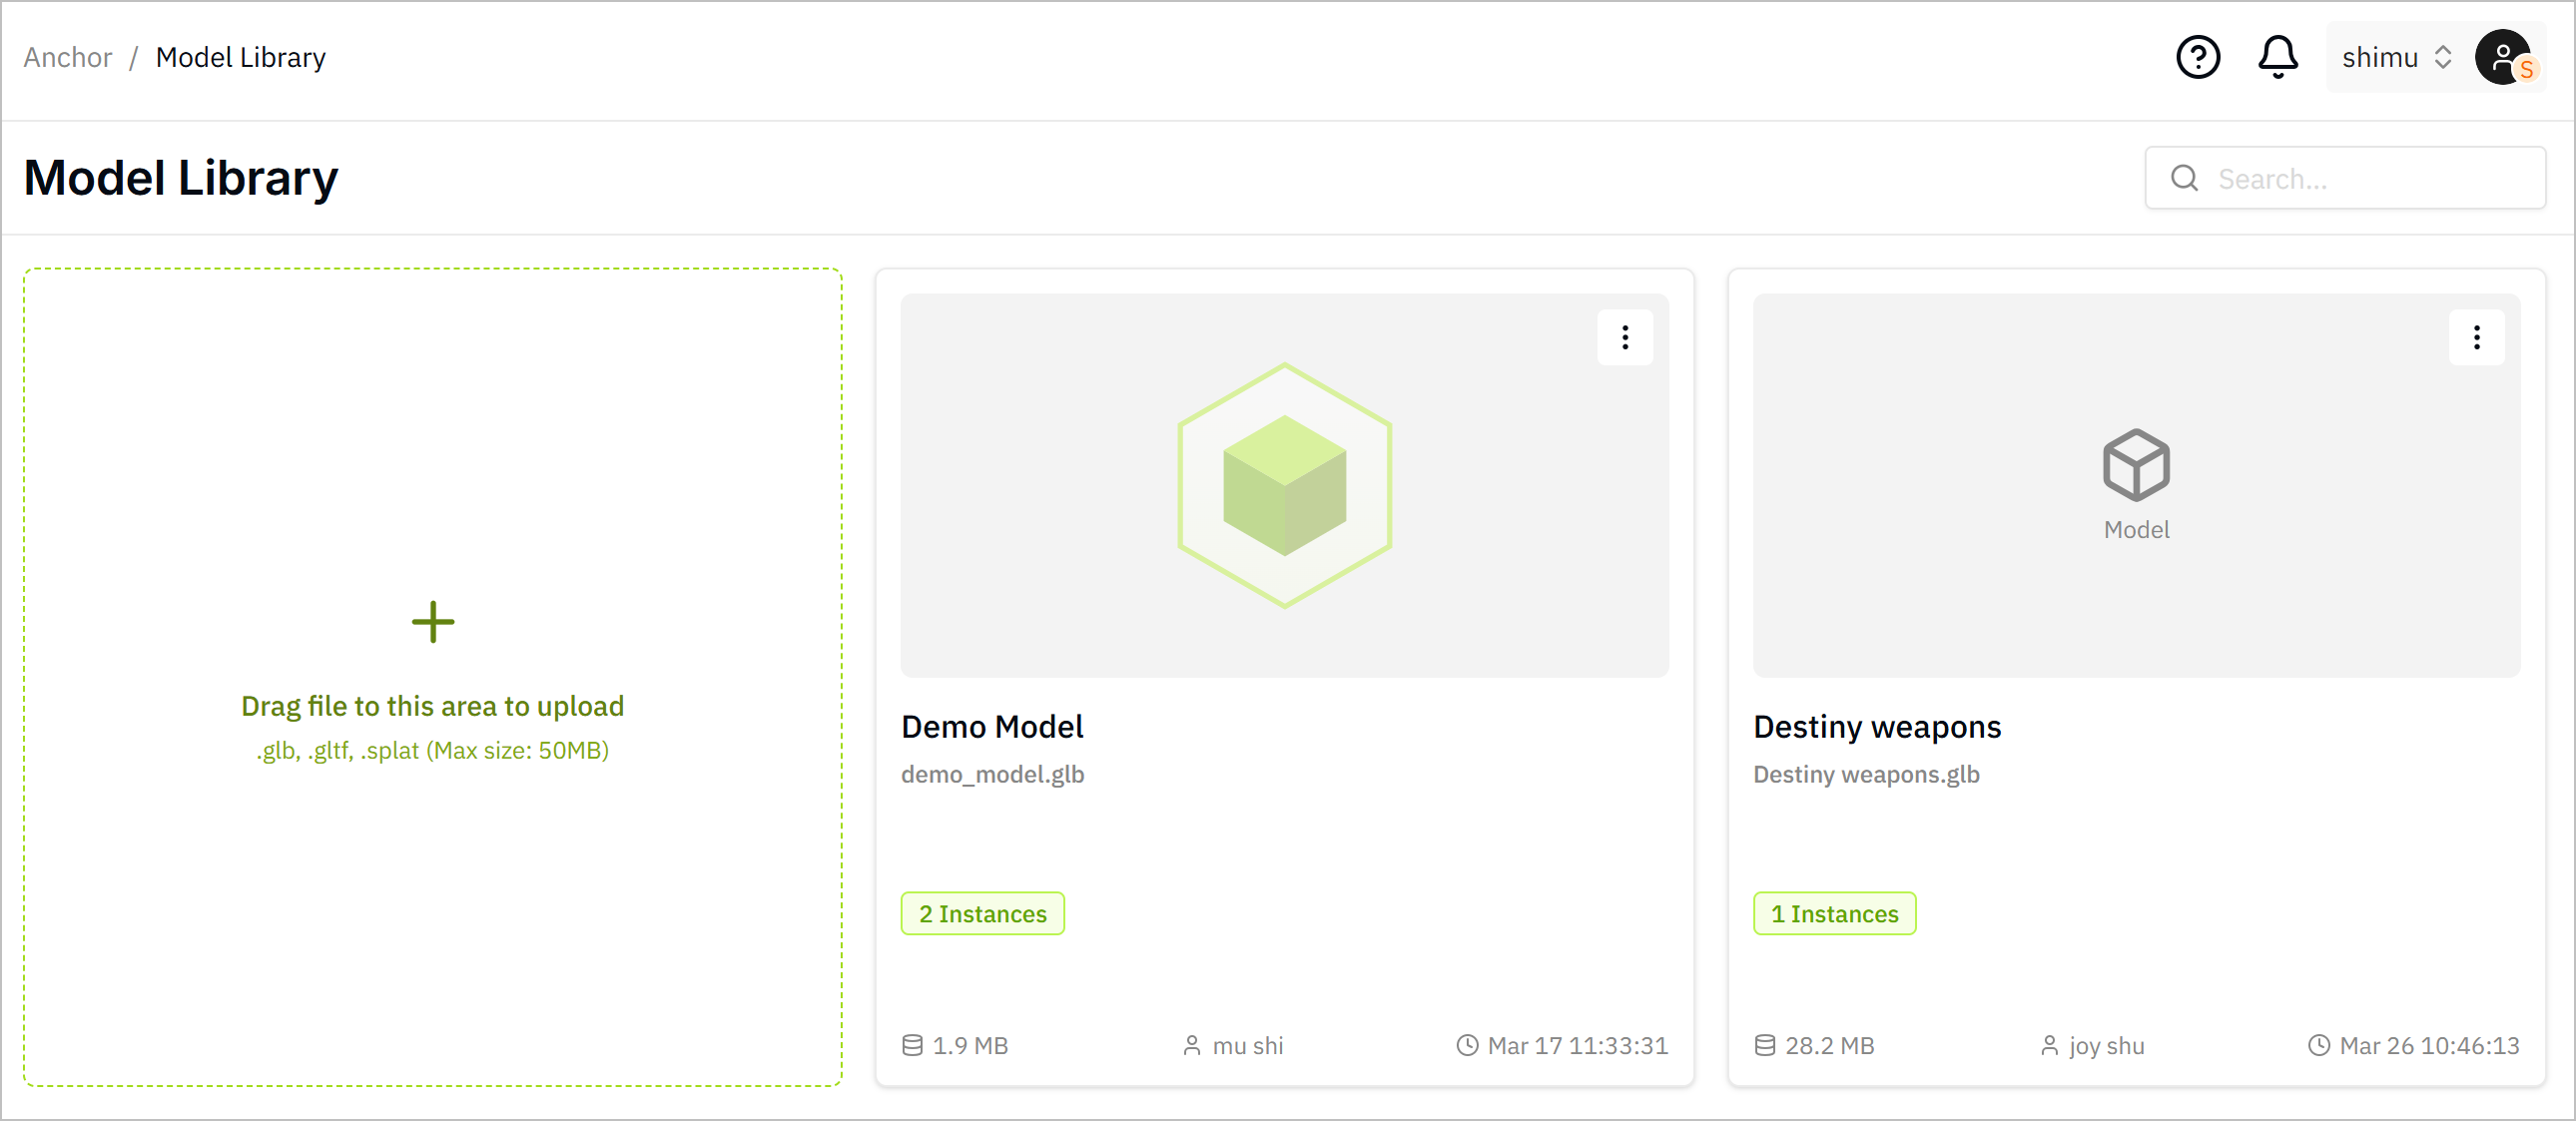
- Click
 , select a model file, and upload it to the platform.
Mapping UNS Data to Digital Twin Models
There are 2 types of data mapping with 3D models.
- Static Mapping: Displays UNS data as a static tag on the scene. Often used in Gaussian Models (no movable parts but in need of data display) or static attributes of structured models (e.g., temperature of AC).
- Motion Mapping: Data mapped to the movable parts of the model, and the parts move according to the data change.
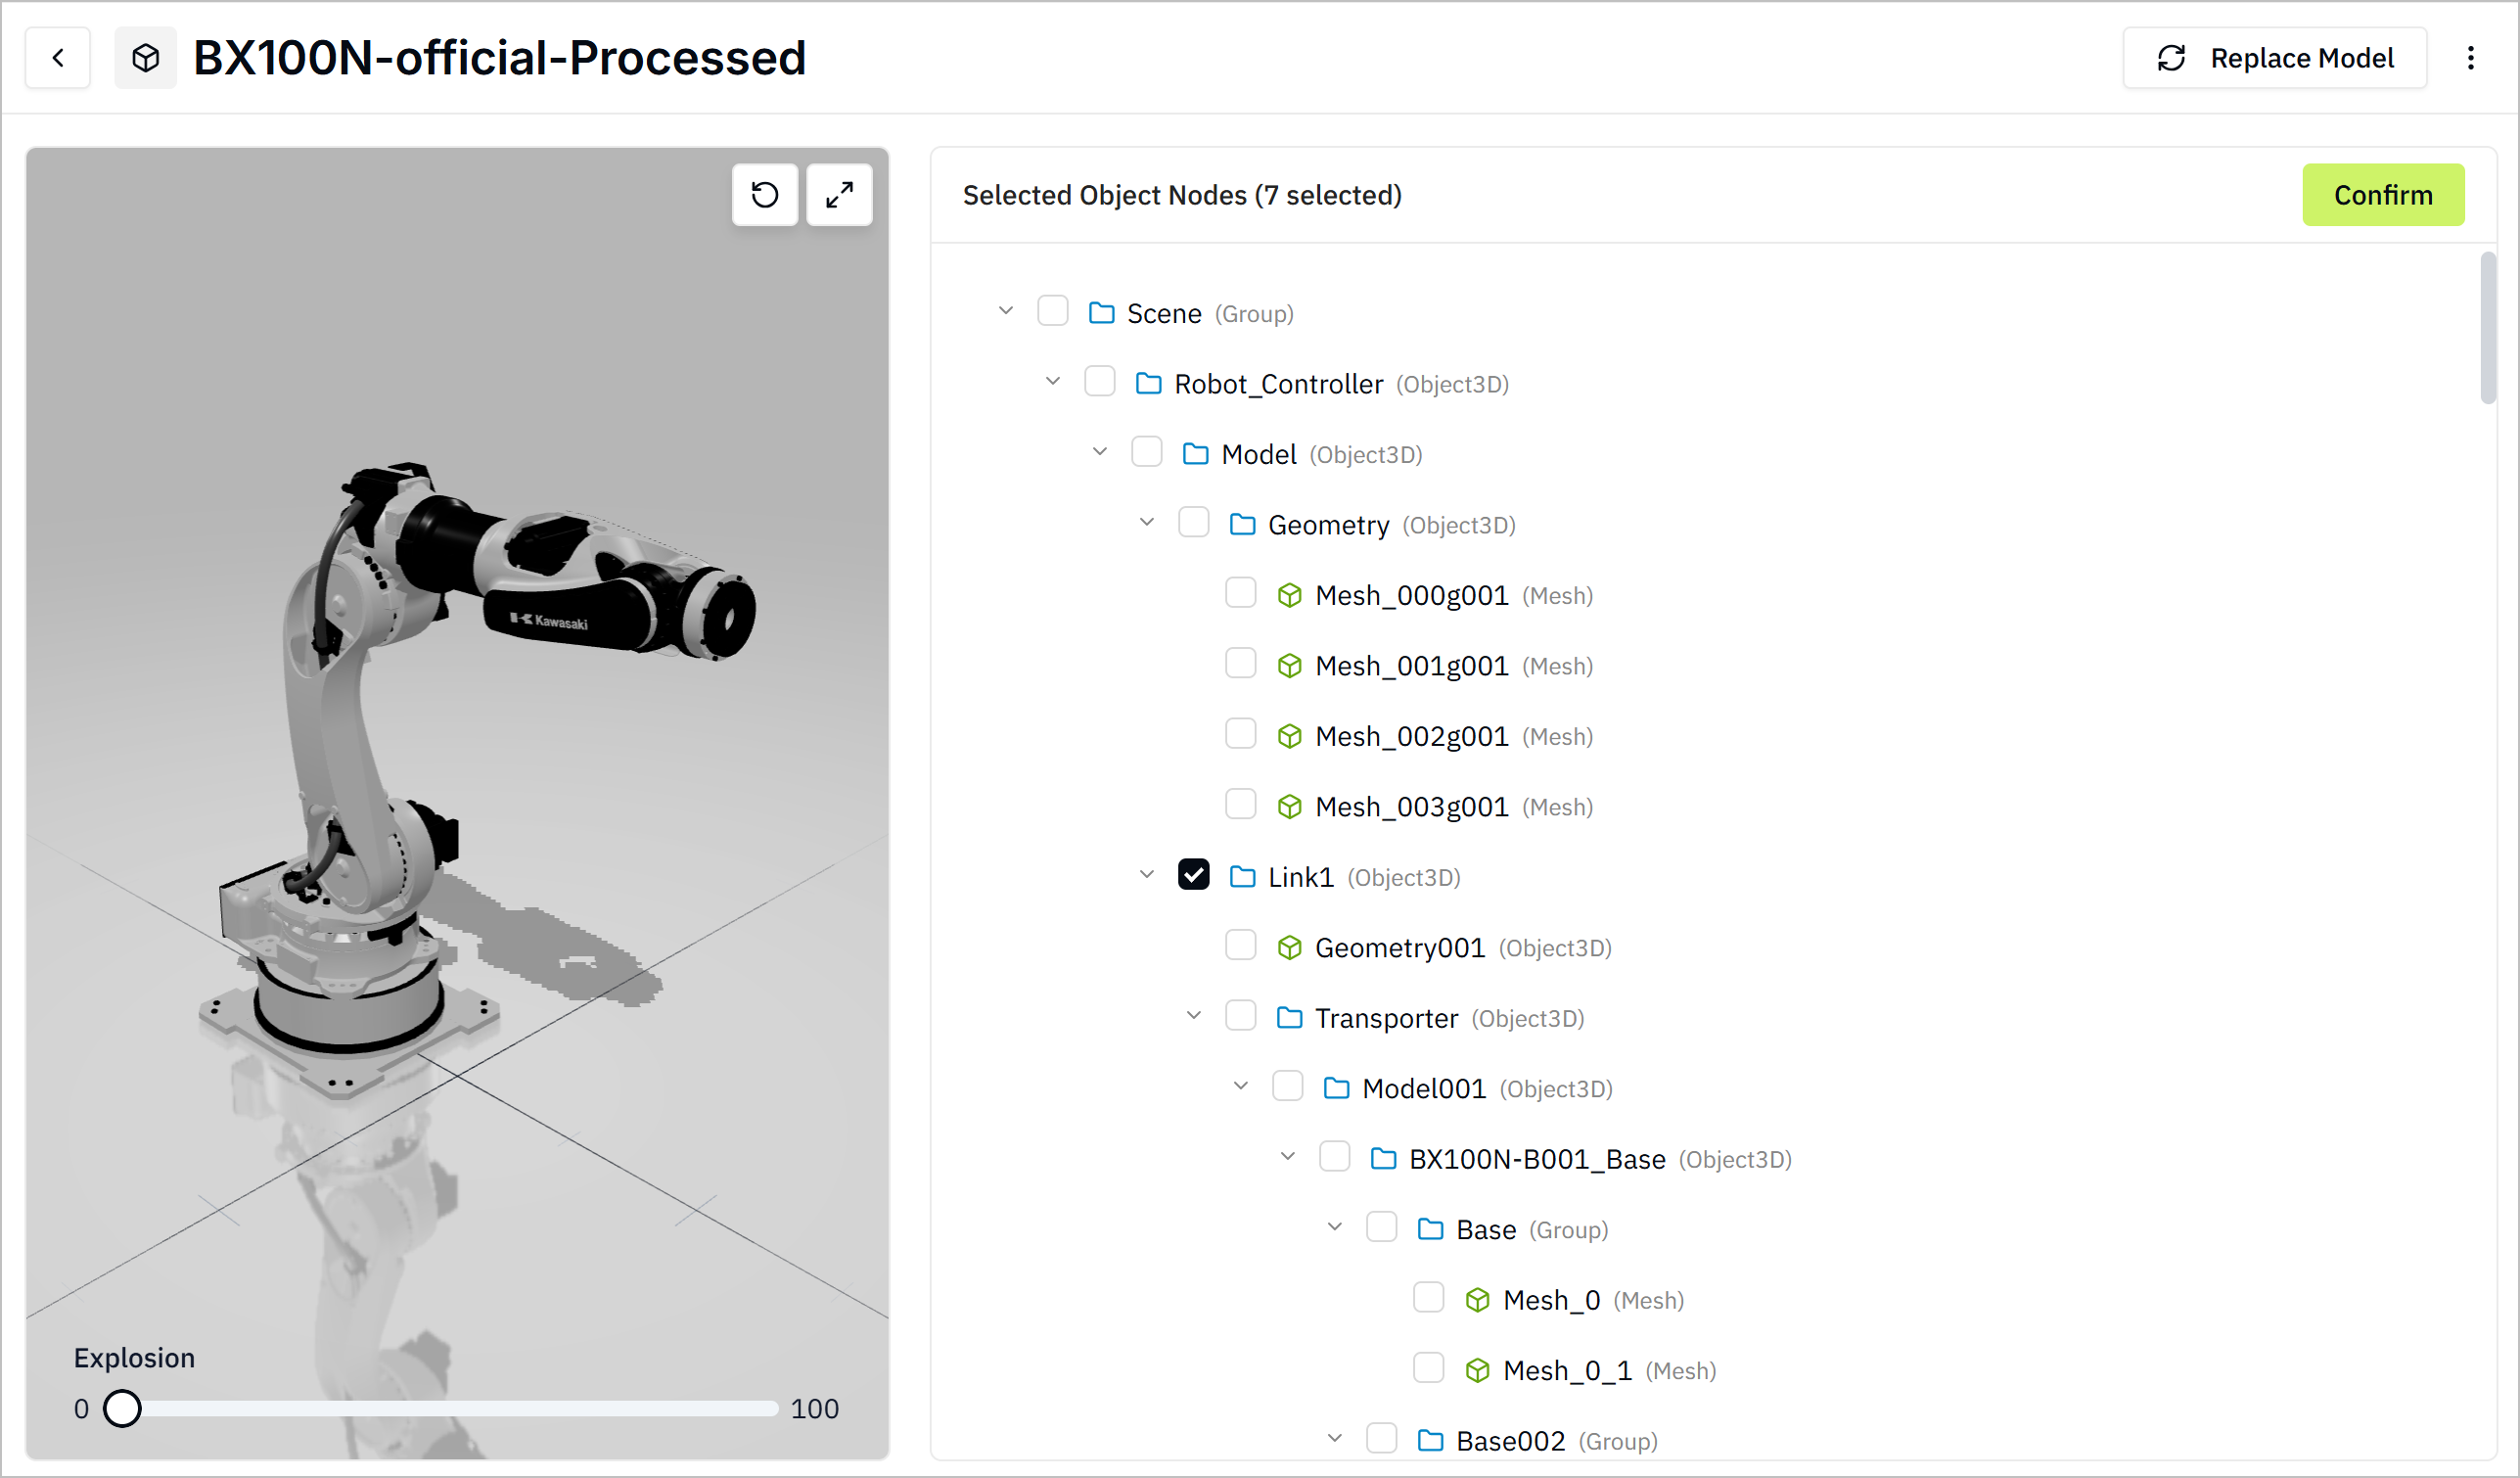
- After uploading the model, click the model to start mapping it to UNS data.
- Select model nodes to be mapped, and click OK.
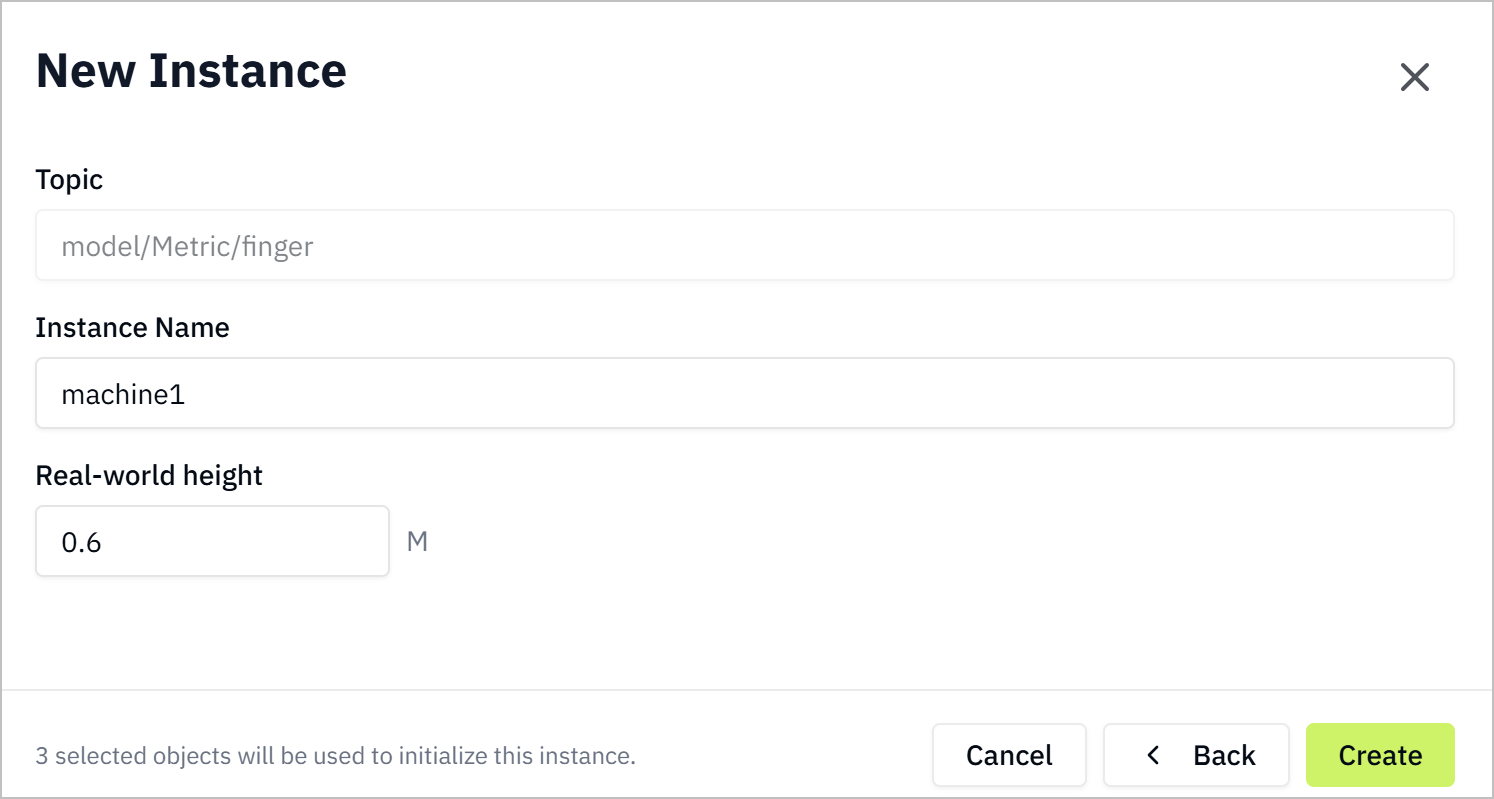
- Click Create Instance, select the UNS data model that controls the model animation, and then click Next.
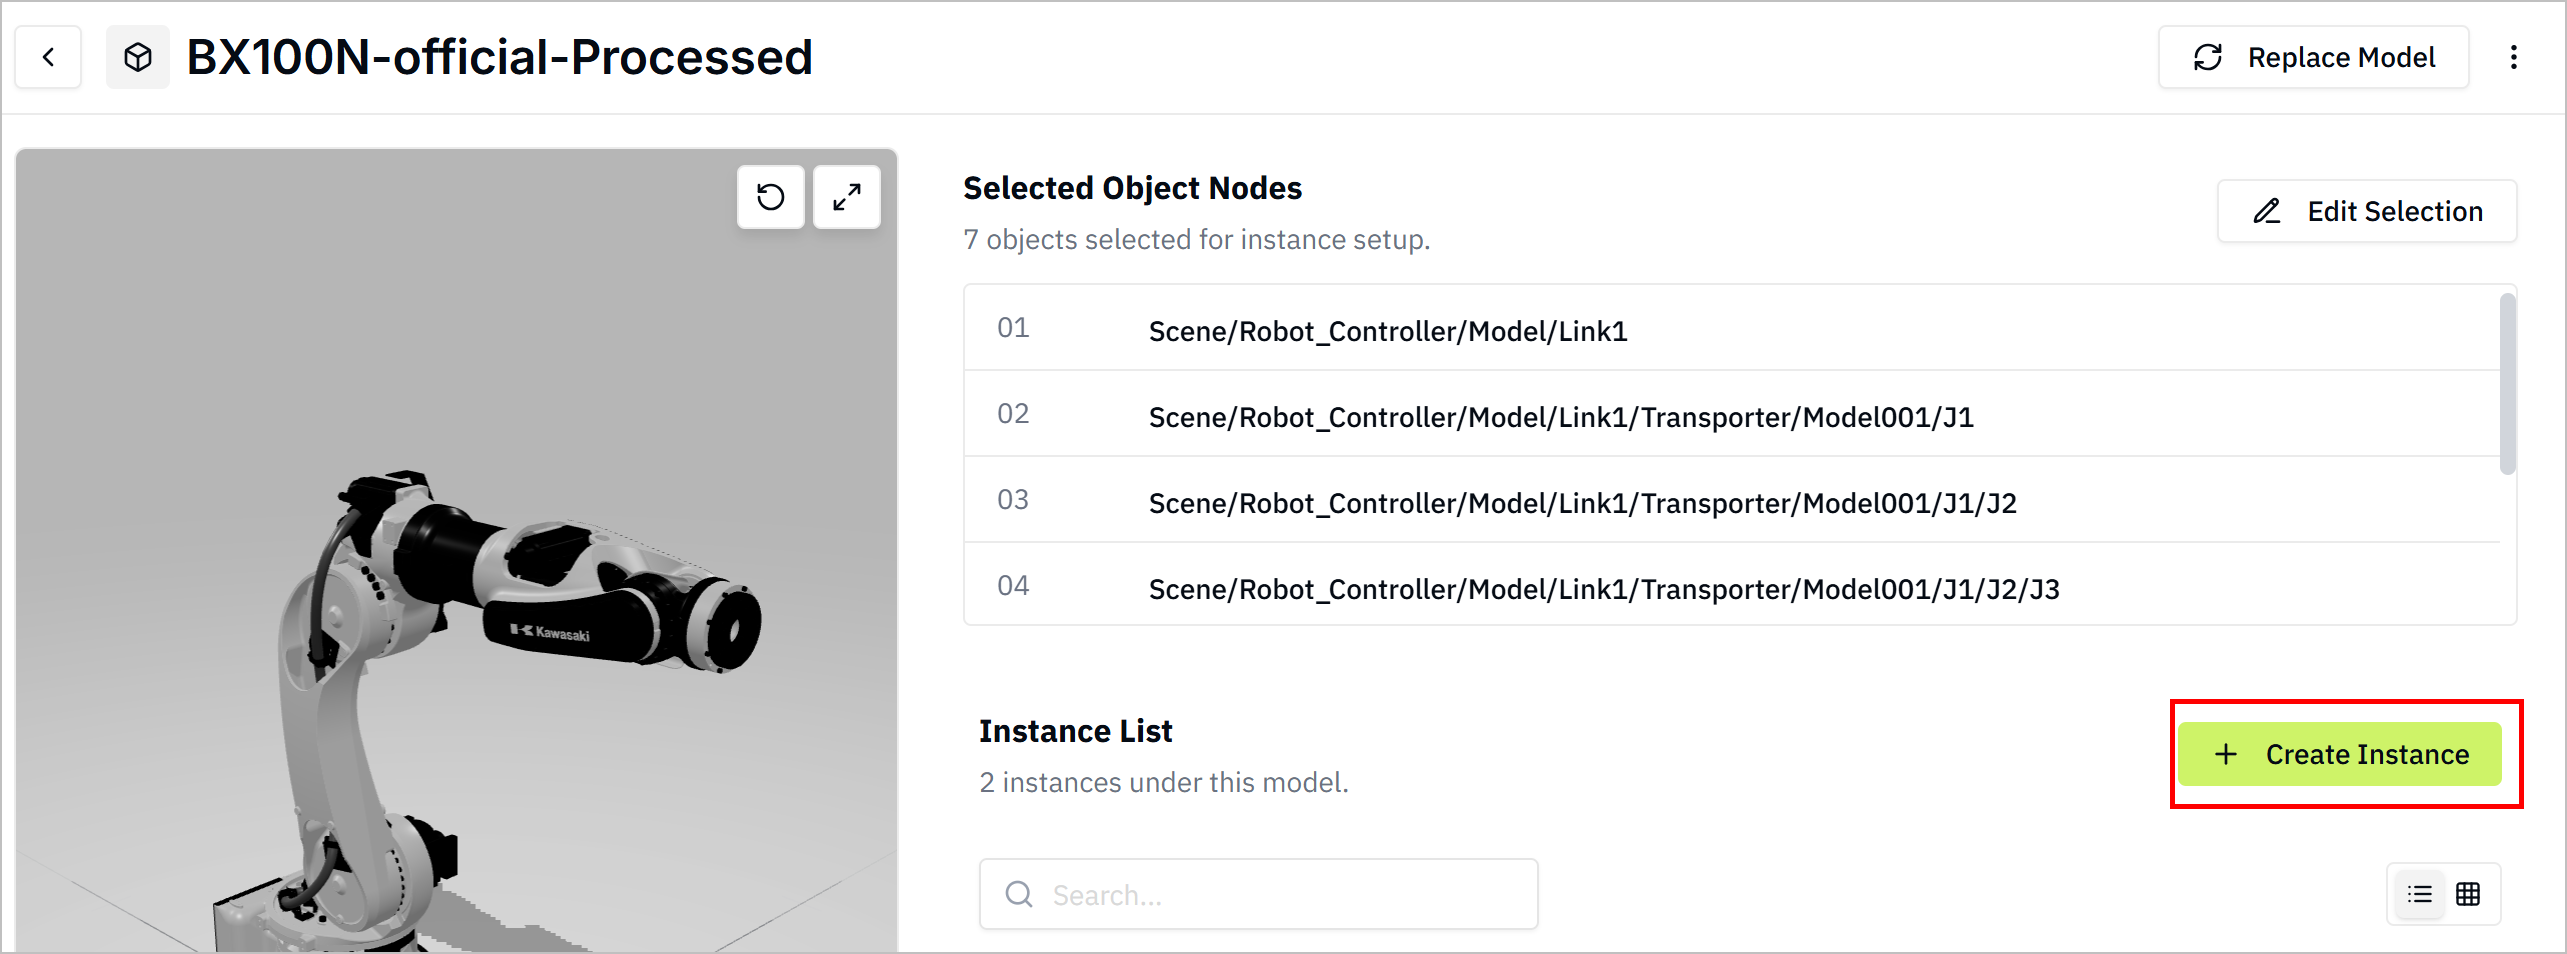
- Enter the Instance Name, set the Real-world Height of the model, and click Create.
Motion Mapping
Bind the UNS data to movable parts of the model.
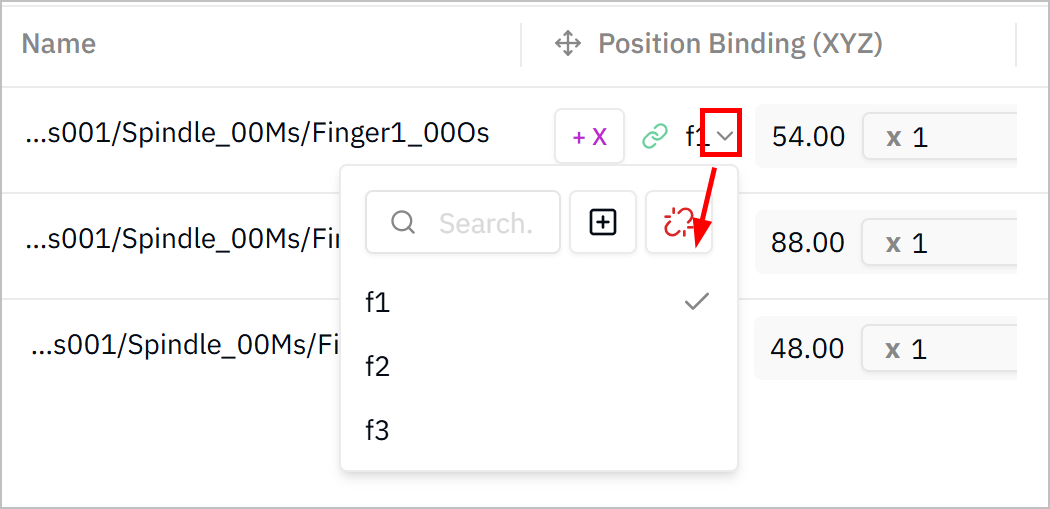
-
On the Model Mapping tab, click
 , and select the axis of the model position coordinatesto be mapped.
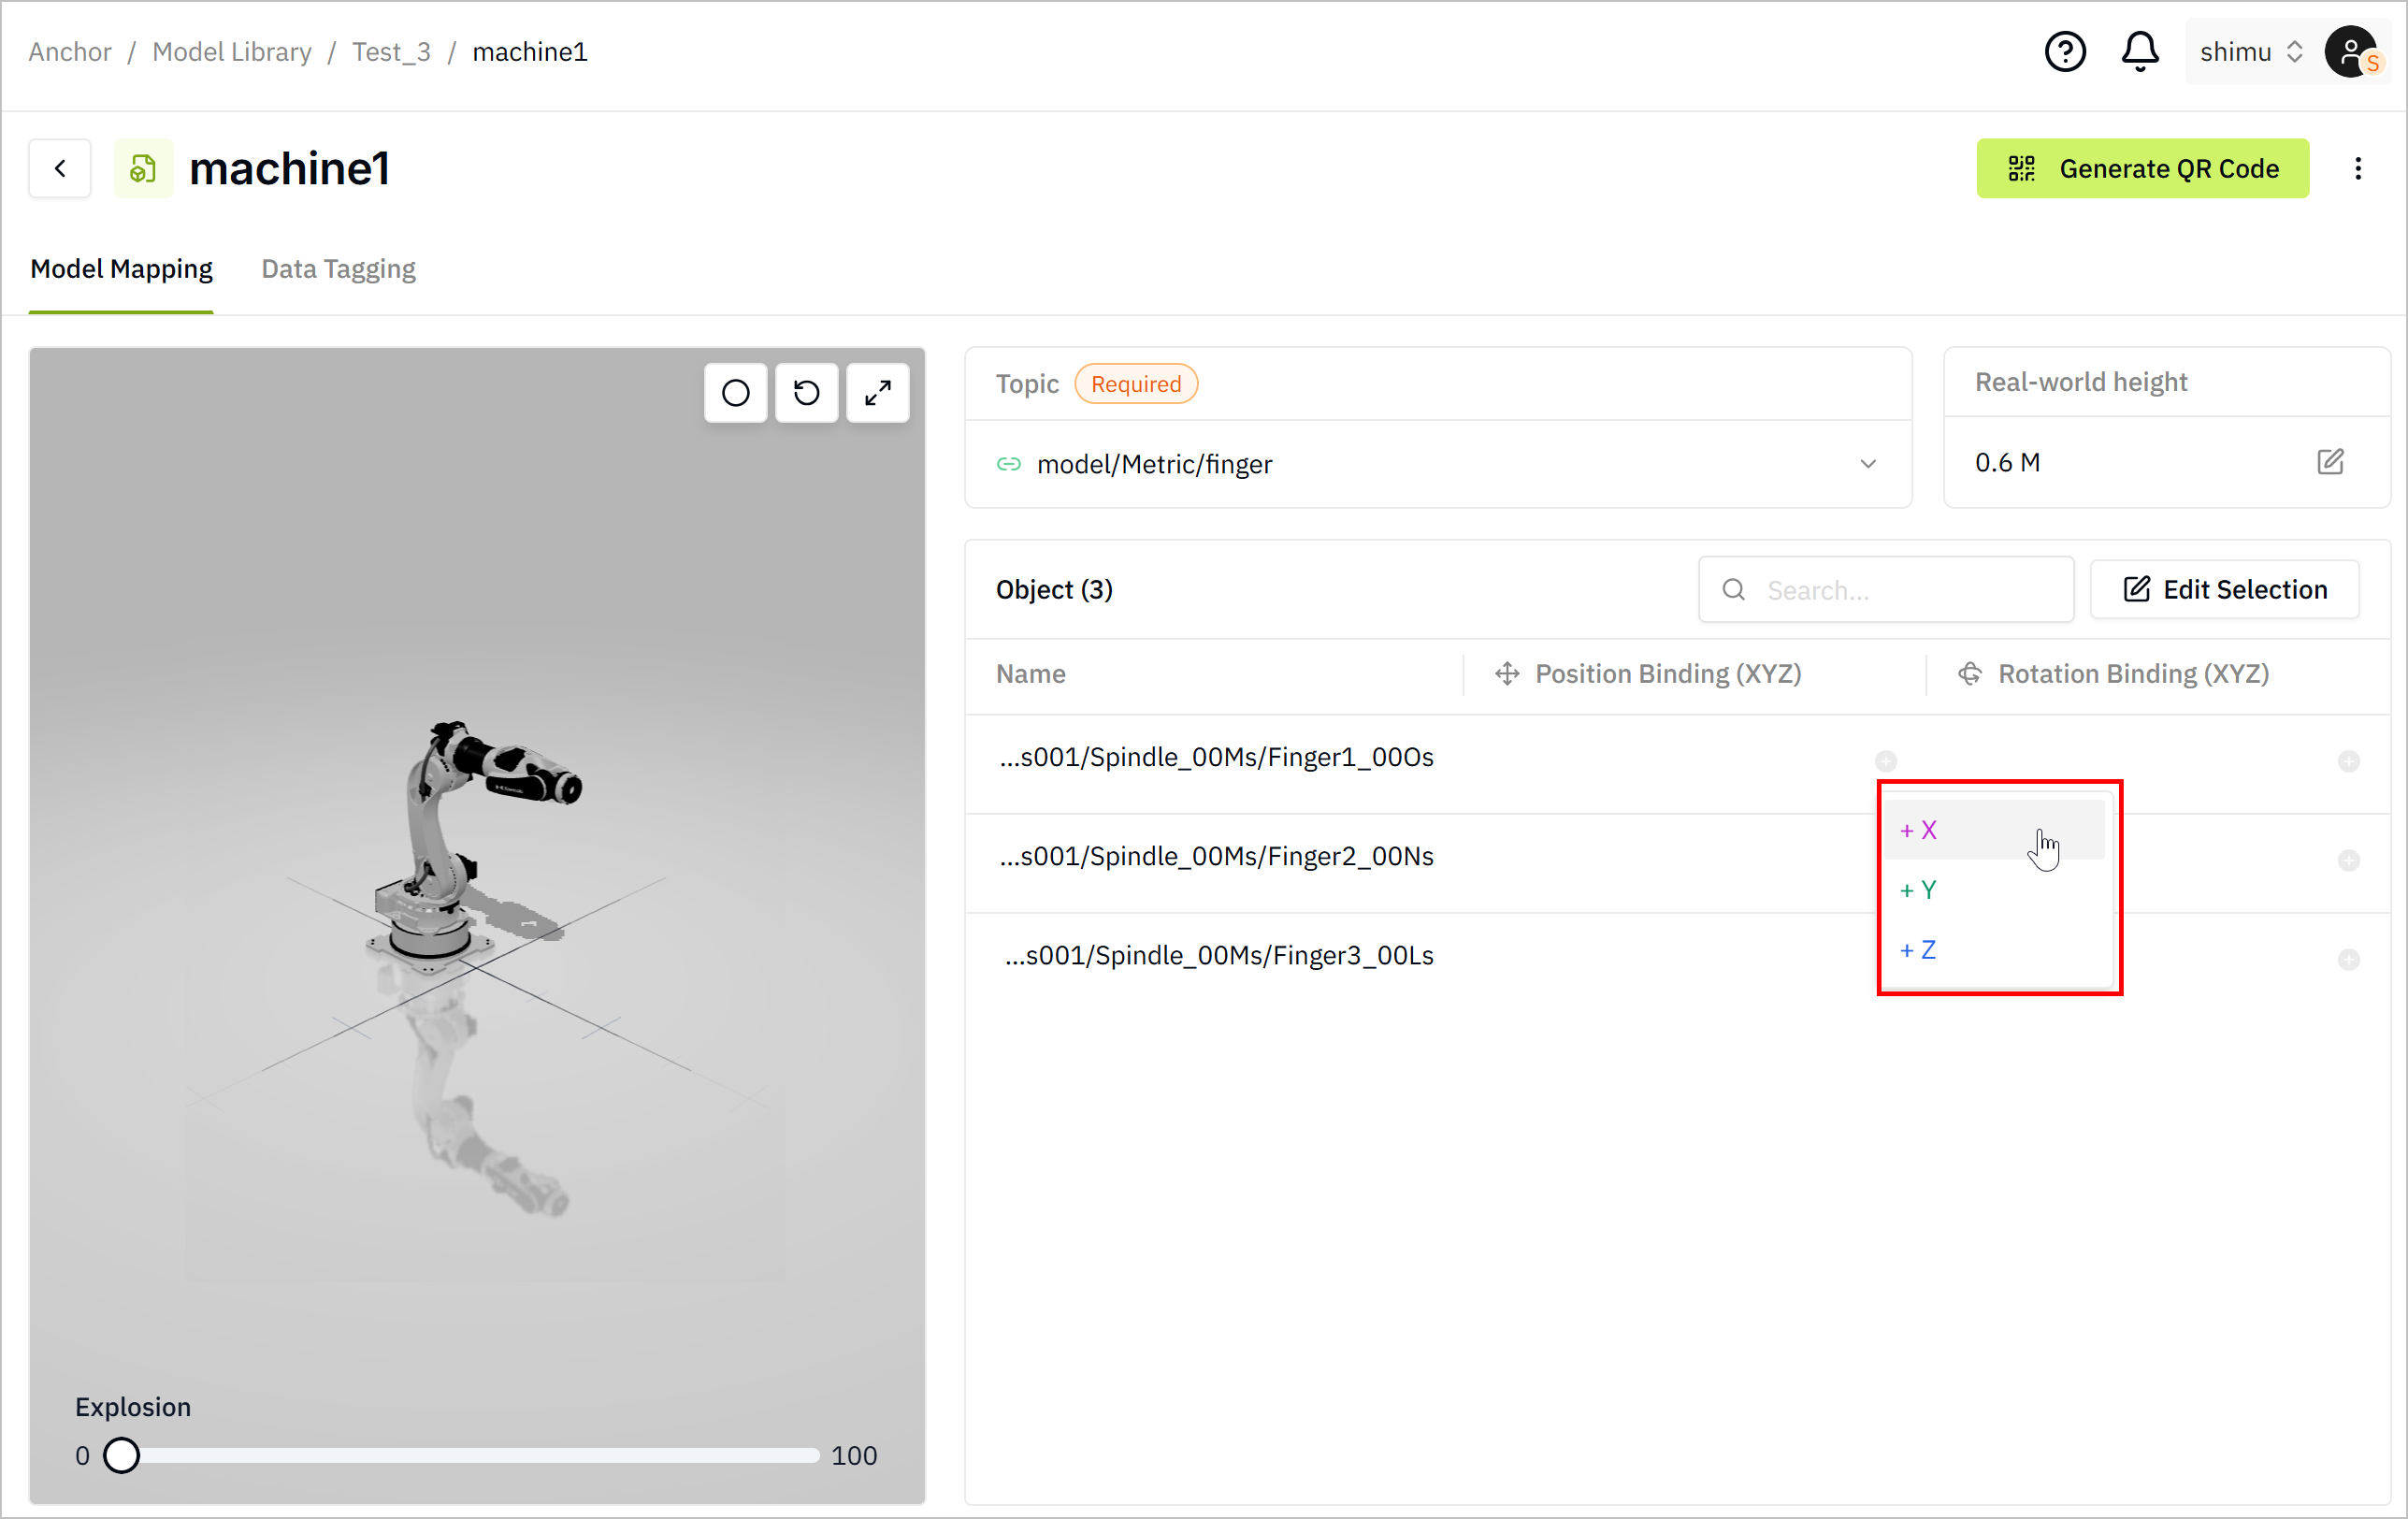
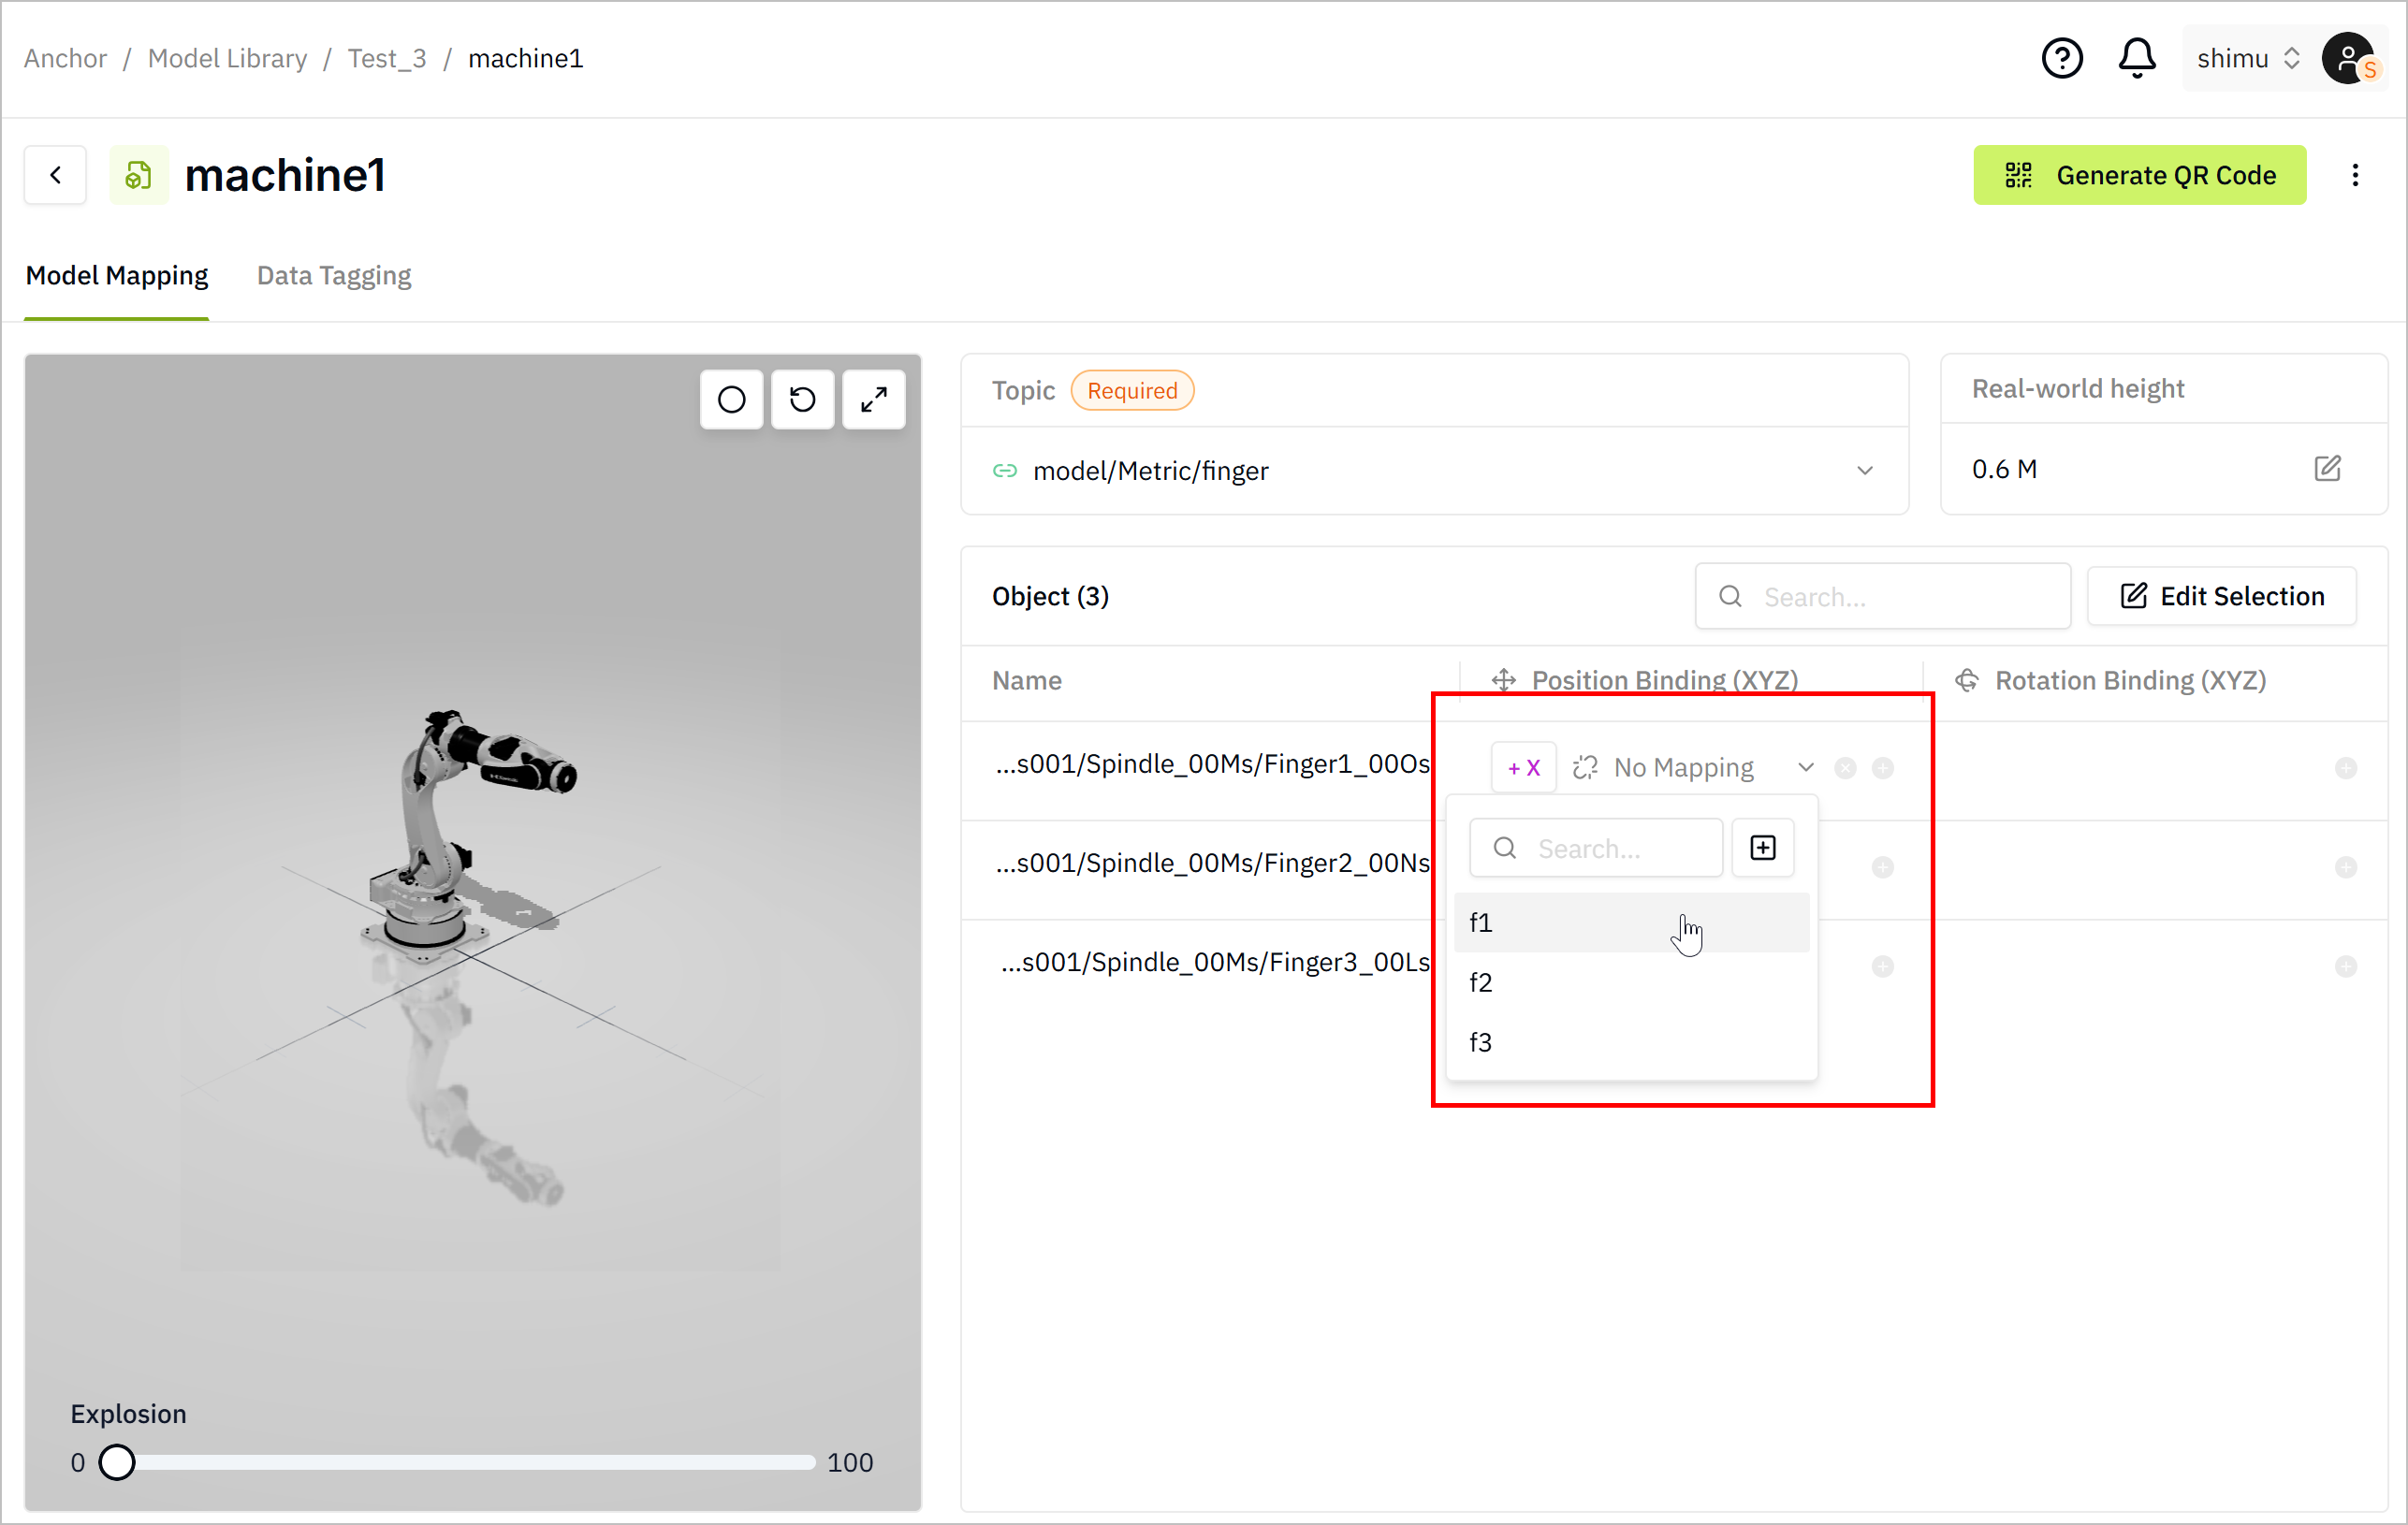
-
Map the data field with the selected axis.
-
Do the same for Rotation Binding to determine how the model parts rotate according to the data change.
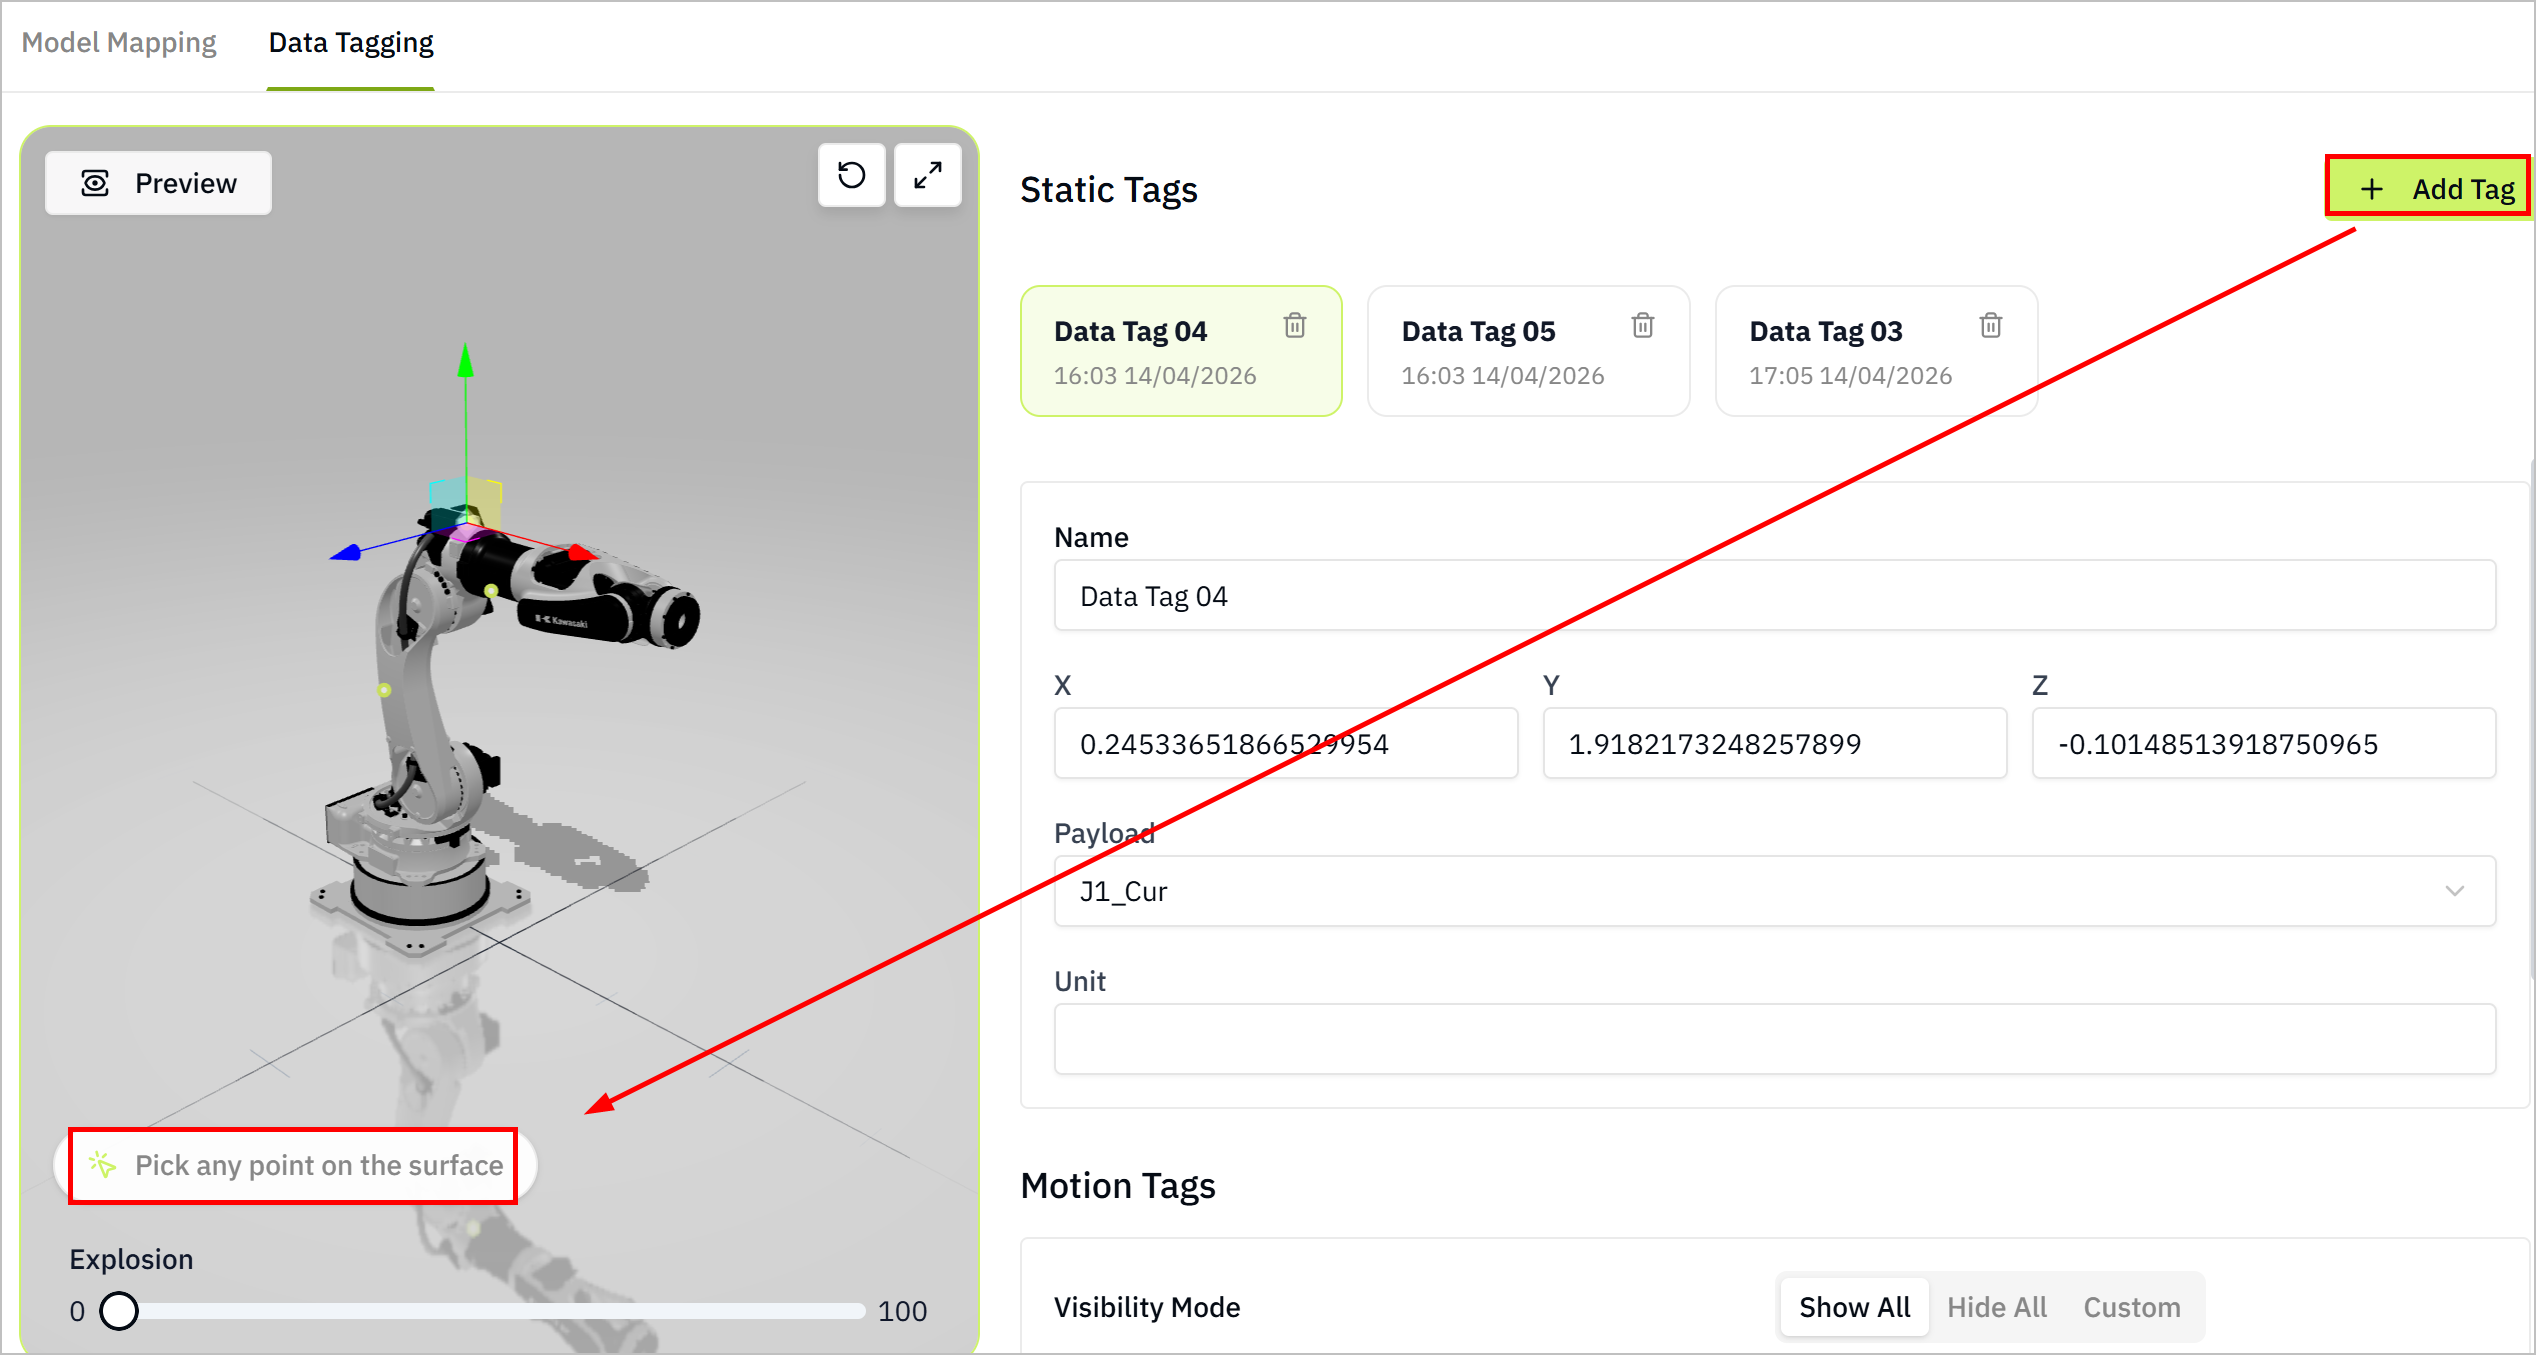
Static Mapping
Bind the UNS data with the model as a static tag.
Gaussian models are only available for static mapping, as they have no movable parts.

-
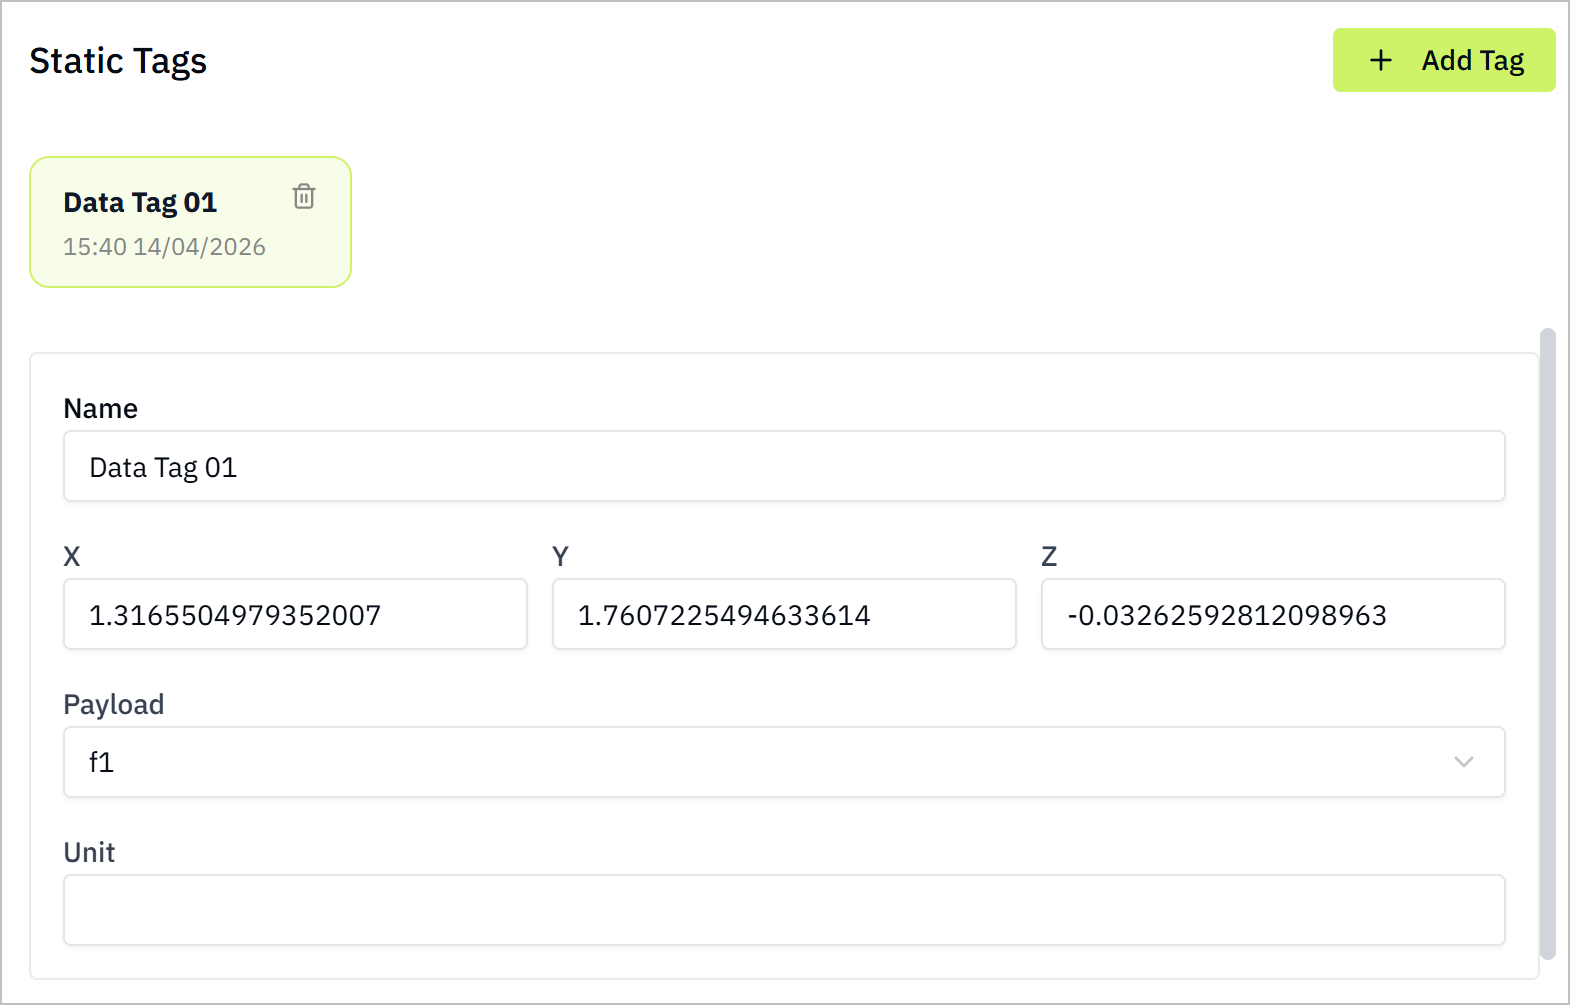
Click Data Tagging, and click Add Tag.
-
Click on the model to select the point the tag represents, and configure the tag attributes.
-
Set the motion tags visibility mode, and click Preview.

Viewing Digital Twin Models
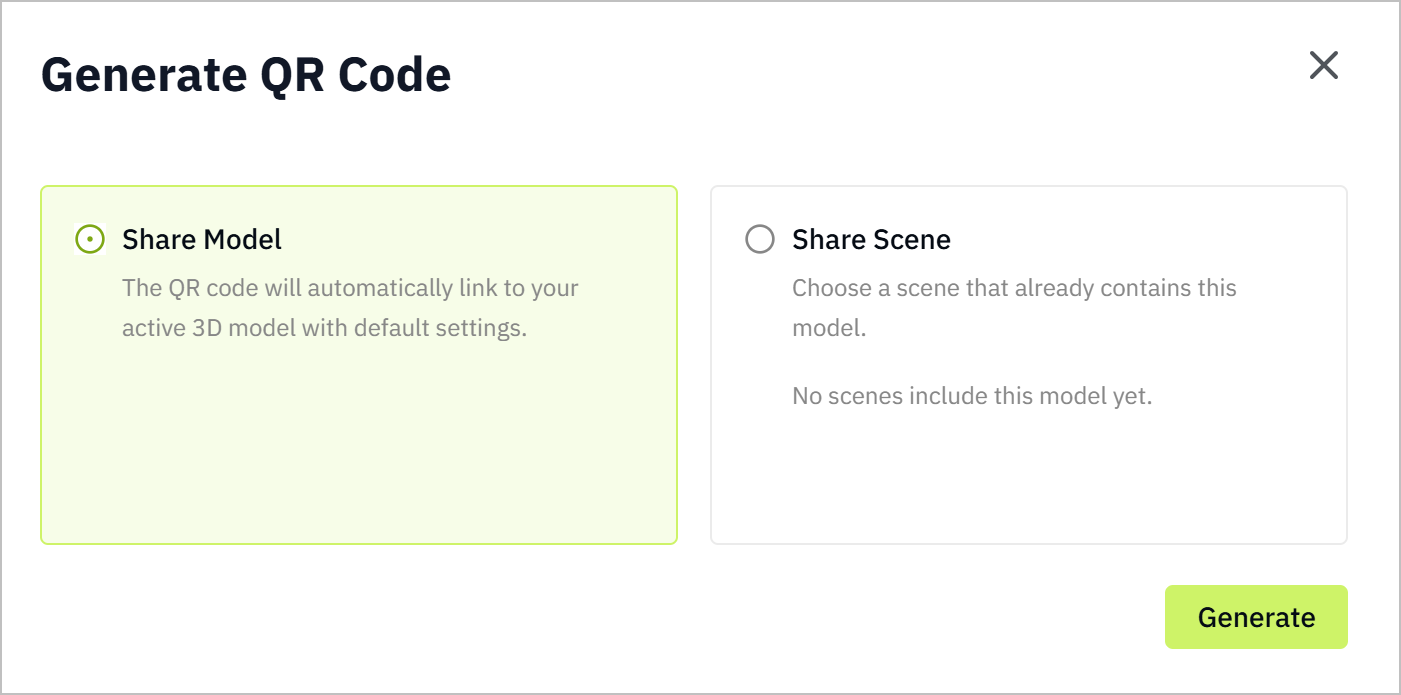
- After mapping UNS data to the model, click Generate QR Code at the upper-right corner.
- Select Share Model, and click Generate.
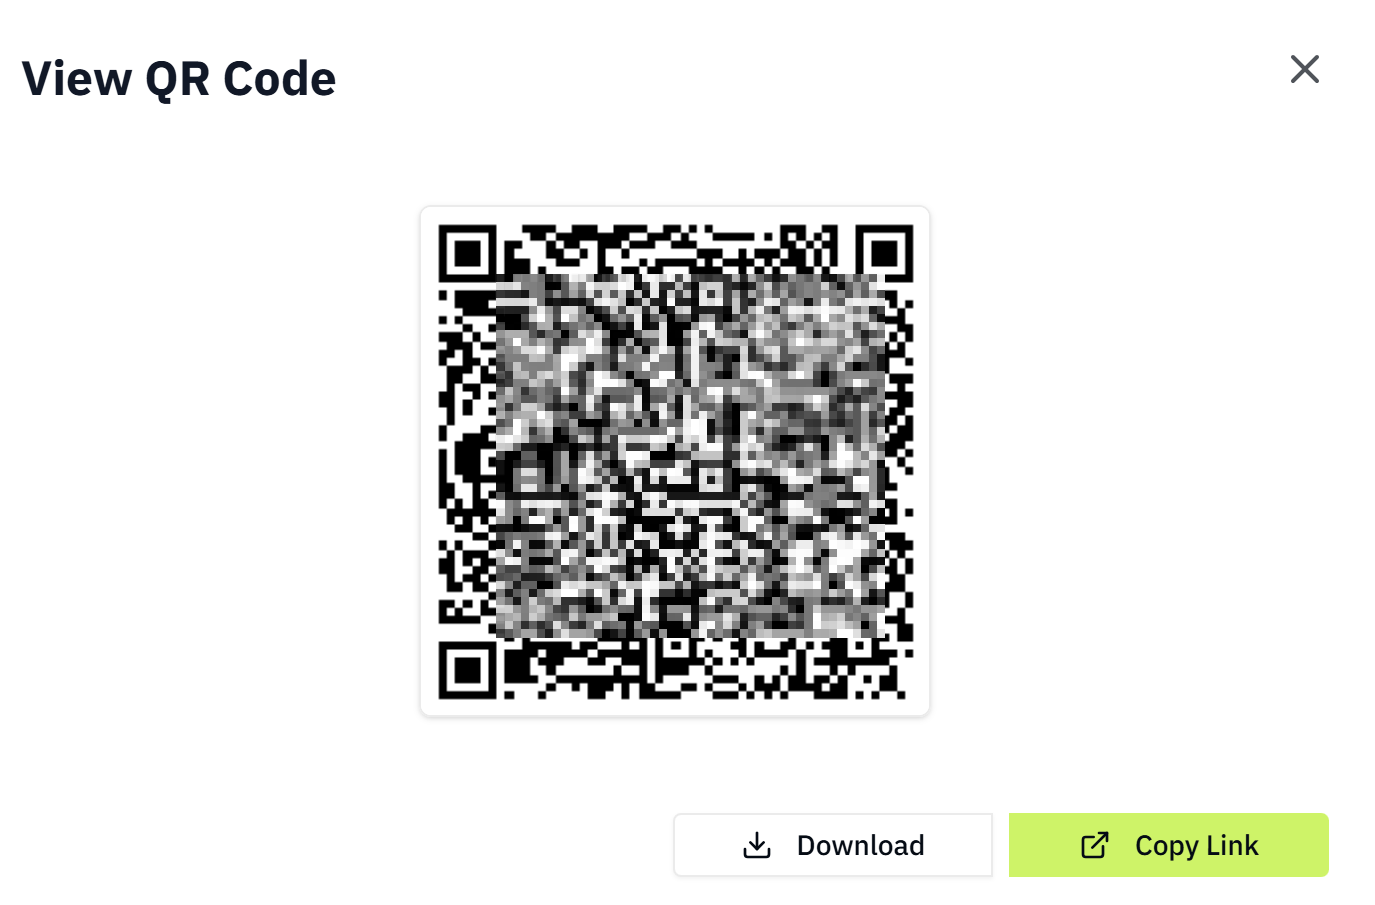
- Scan the QR code to view the digital twin model on your mobile device.
- When the model is added to a scene, share the scene to view the model with position, lighting and other settings.
- You can also download the code, or copy the code link for later use.
Quick Operations during Mapping
Node mappings are saved automatically.
On the Model Window
- Click Replace Model at the upper-right corner to replace the model while keeping the mapping settings after analysis.
- Drag the slider of Exploded View at the bottom of the model window to view the model parts.
- Click
 to display the model in its original state.
 - Click
 to view the model in full screen.
On the Mapping Tab
- Click Edit Nodes at the upper-right corner to modify selected nodes.
- Click
 to disconnect a model node from the instance.
 - Click
 to add payload to UNS topics for quick mapping with new data.